Quantcast
Channel: Simple & Sinister Archives | StrongFirst
Viewing all 73 articles
Browse latest View live

An excerpt from: Kettlebell Simple & Sinister

$
0
0

By Pavel Tsatsouline, Chairman


Ladies and gentlemen, I present you my new book, Kettlebell Simple & Sinister.

If you are new to kettlebells, S&S is your entry point.  If you have been around the kettlebell block, S&S will deepen your understanding of the hard style system and introduce you to important subtleties of technique and programming.

Kettlebell Simple & Sinister starts with an accelerated sequence of learning the swing and the get-up, refined over the years of teaching.  The goblet squat and several other key stretches are introduced to unlock your hips.

The programming is best described by the ad for the latest generation of the battle tested F-16 fighter jet: “Proven.  Powerful.  Perfected.”

I do not care how smart you are and how hard you try, you are not going to one-up the Program Minimum by Steve Baccari.  No other kettlebell routine will deliver such extraordinary returns for such a minimal investment of time and energy.  Period.  Without touching this classic program’s DNA, I remastered it with research and experience of the last decade.

Our strength bias has gotten stronger than ever.  You are not going to rush your rest periods—you are going to dominate the biggest, baddest kettlebell.

I am not going into the scientific nitty-gritty in the book—but the set duration, volume, and rest periods experimentally arrived at by StrongFirst’s most experienced instructors like Mark Reifkind, Michael Castrogiovanni, and others are eerily in line with cutting edge Russian research.  Instead of killing yourself in the lactic acid zone, you will be training to exert your maximal power over and over—and rapidly recover aerobically.  The mindset of the remastered PM is that of a predator, not prey.

The PM progression has become nearly foolproof.  A special option with lighter overspeed eccentric swings and static-dynamic method get-ups has been introduced.  It will enable you to train and keep making progress on the days when you are not at your best.

The training loads were carefully laid out to give you more energy for sports and other pursuits rather than to drain you.  Because you have a life beyond kettlebells.

Following is a short excerpt from Kettlebell Simple & Sinister.


A Little Every Day Goes a Long Way

More is not better, it’s just more.

—Steve Baccari

Would a higher volume be more effective?  Would shorter rest periods?

Perhaps—but at what cost?

First, consider that StrongFirst puts a premium on strength and power.

It is tempting to write off the kettlebell as only an endurance tool, given its relative lightness.  But do not forget the “virtual force” that multiplies the bell’s “heaviness” by as much as ten times in the hands of a skilled hard style girevik.

If you are told to do a higher volume or to compress the rest periods, you will unavoidably start holding back power, pacing yourself.  Your goal would change from getting the desired training effect to just surviving.  Remember Dr. Hatfield’s “cardio” training instructions to a power athlete: “an all-out effort… maximum contracture against submaximal resistance.”

Another issue is efficiency.  Once you reach a certain volume, you hit the point of diminishing returns.  The human body is a non-linear system.  This means doubling your swings from 100 to 200 will not double the results—far from it.  A decade ago Michael Castrogiovanni, today an SFG Team Leader, identified the swing workout that gives the most for the least: 100 swings total, three times a week.

Tim Ferriss, always dedicated to finding the minimum effective dose, discovered that as few as 150-300 weekly swings was the dose for him.  A total of ten to twenty minutes of weekly swings got him a ripped six-pack and added over 100 pounds to his deadlift.

Finally, there is the big issue of leaving enough energy for other things—practicing sport skills, being ready to fulfill your duty on the battlefield, or just enjoying your day and not dragging your tail through it.

Bulgarian elite gymnastics coach Ivan Ivanov believes that the purpose of a training session is to store energy in the body rather than exhaust it.  That is a powerful mindset.  In Ivanov’s experience, 100 repetitions per movement hit the spot—and these must be done daily.  I concur.

It may seem strange to recommend training without days off when the goal is storing energy, but moderate daily training will keep the muscles’ fuel tanks topped off, while making tissues resistant to microtrauma and almost soreness-proof.  It is the ticket to being always ready.

Prof. Arkady Vorobyev explains that incomplete restoration training stimulates the recovery ability; your body literally has to learn how to recoup faster…or else.  Those who have served in the military can relate.  You got sore after your first day in basic training, but you persisted—as if you had a choice—and kept up with the daily grind of pushups and runs, and finally you could handle it.  If you were given the unlikely choice of PT-ing only when you had totally recovered, you still would have been stiff, sore, and a sissy.  This is why the S&S program, while tolerating a minimum of two workouts a week if you are in a pickle, prescribes near-daily training.

Think of the S&S regimen not as a workout but as a recharge.

One of the meanings of the verb “to work out” is “to exhaust by extraction.”  Ponder that for a moment and ask yourself if that is your goal.  In contrast, “recharge” is the name Russians gave to an invigorating morning exercise session.  Out with a workout, in with a recharge!

A U.S. military special operator (you know him from Easy Strength as “Victor”) will tell you what Kettlebell Simple & Sinister has done for him and can do for you:

I have been training consistently for the past 20 years: cross-country, swimming, and lacrosse in high school; running, rock climbing, weight training throughout college.  I have spent the past thirteen years serving on active duty in U.S. Special Operations.  I have completed more than a few arduous military training courses that required a blend of strength, endurance, and durability.  I do not have the luxury of being able to focus on only one or two aspects of physical fitness.  I have to be well balanced across the entire spectrum of fitness.  My workouts have to be efficient, and I do not want to risk getting injured in training, because I need to be totally healthy and injury-free in order to be effective in my job.  Pavel’s training principles have been a huge influence in my training, and kettlebell training has not only increased my fitness and durability, but it has allowed my train anywhere, anytime.  I have developed a personal training program that has been heavily influenced by the Program Minimum and Pavel and Dan John’s principles of “Easy Strength”.  This program has allowed me to develop a blend of strength and endurance in the most efficient way possible.  I have avoided major injuries, and I have made steady and consistent progress since high school. 

In my opinion, Pavel’s Kettlebell Simple & Sinister is an ideal program for a military professional.  The Swing and the Turkish Get-up are two exercises that produce maximal results in the most efficient way possible.  S&S will allow for safe and progressive increases in strength and conditioning and it can be done anywhere, with minimal equipment.  I have been training almost exclusively with the S&S principles for the past five years, and I can honestly say that it has been the foundation upon which I have built my operational and recreational fitness.  The S&S principles, combined with consistent and progressive training, have given me the strength to accomplish a broad range of athletic feats in addition to maintaining my operational fitness requirements.  I have been able to complete a 100-mile endurance run (with 23,000 feet of elevation gain/loss) in less than 25:00 hours and I have closed the Captains of Crush #3 gripper with my right hand (parallel set).  Pavel’s lessons in relaxation, tension, and safe biomechanical movement have been critical to my athletic success.

The clarity and simplicity of S&S make this one of Pavel’s finest programs.  I would recommend this program without hesitation to ANYONE in the military, or in jobs that require physical strength and durability. 

Repeat until strong.

Order your copy of Kettlebell Simple & Sinister

Paperback, Kindle, or Audio Book


Gray Cook on Simple & Sinister

$
0
0

Simple and Sinister, Pavel Tsatsouline’s new book, is eloquent in its simplicity. People try to overcomplicate a position by adding more where it’s unnecessary, but the true artist sculpts, whittles and pares things down to leave something that’s absolutely beautiful—not by adding more but by taking away.

Kettlebell Simple & Sinister by PavelTo those of us experienced in kettlebells—if we have a background with Pavel or a background in strength training—in Simple and Sinister he’s telling us things we know, but need to hear again.

(If you’d prefer to listen instead of read, 
here’s a longer audio version of this article, 
Episode 40 of Gray Cook Radio
 http://graycook.com/?p=625)

And if this is your first introduction to kettlebells, I can’t think of a better starting point than Pavel revisiting some of his most profound philosophical statements about strength training.

Yet here he goes one step further: He writes the entire program for us, and he does an excellent job of building a case for his exercise choices.

Mark Cheng, Senior SFG - Getup

He discusses the beauty and simplicity of the Turkish getup, and shows that done right, it’s the slow, posturally correct, proprioceptively rich checking of left and right symmetry in multiple movement patterns and multiple positions—a sort of triplanar functional exercise.

The swing is an exercise that’s often bypassed in kettlebell work. People quickly move to snatches and cleans, bent presses and other complicated lifts, and don’t realize the engine that drives Pavel, Brett Jones, Mark Toomey, Dan John and the folks working with StrongFirst is that they never get away from the foundation.

That simplicity is what we need from our modern palate of exercise. We don’t need more variations and more options. We need a simple linear progression to get us to an exercise that has more benefits at minimal risk.

What Pavel has done is given us a program minimum, and that’s the same philosophical standpoint I’ve gotten to with the Functional Movement Screen. I don’t care how good you are, but please don’t leave a dysfunction or a deficiency. That’s what Pavel is doing, too: This is your minimum.

We know life is going to throw you less training time. Your occupation will add stress. The commitments we have in life outside of our personal fitness will often cause us to pare down our chosen exercise program.

Unfortunately, often turn to a specialty. Runners don’t have time to stretch and lift, but they have time to run. Lifters do the lifts that give them positive feedback and probably avoid those that are their weakest links.

What Pavel says is, ‘I’m going to give you a couple of exercises done a certain way. When in doubt, do that. Get better at it. There are some variations. There are some progressions you can do, but be satisfied with the amazing results.’

That couldn’t be more perfectly stated.

When I lecture to young exercise professionals, they want more variety. They want more options, more variations of exercises.

Gray CookAre you sure? Are you asking me for more deadlift variations? Doing more variations of a deadlift isn’t going to make you a better swinger. It’s just going to give you more functionality in the deadlift.

Yet we love to progress your deadlift into a swing. The deadlift is a beautiful foundation, but for fat loss, metabolic power generation and athletic movements, it’s the swing that’s going to bring everything to the surface. The swing will mutually benefit one person who wants to get stronger and one who wants to have more speed and power.

I have just too many good things to say about Pavel’s new book. I downloaded it as an audio book, and have listened to it twice. Now I’m going to go back and thumb through the pages because I want to see his photographs and explanations.

The Naked Warrior by Pavel

It’s a work I’m going to lay right next to his previous work, The Naked Warrior. Pavel creates a constrictive program, and I’d like to elaborate on that. He’s giving us two contrasting and complementary exercises. These are going to present difficulty. You can control some of that by how much weight you use, but at no time do you have the option of using poor technique.

Pavel has a certain way he likes to train his explosive movements, which he calls hard style. It’s the safest and most well-thought-out way to deal with power moves and moving weight. The steps he gives to build a swing and to build a getup are constrictive. They’re going to run you right up against your problems.

He’s doing that because he can’t be in the room with you. The best coaches in the world can design a program not with restrictions, but with constrictions. These constrictions force you to have better form, force you to do the right amount of work at the right time, and force you to rest on a certain day and work harder on another day.

Constrictions are one of the reasons I designed the Functional Movement Screen, so we’re not putting a bad pattern under load. What Pavel has done is given us a beautiful way to get under load and at the same time to enhance movement quality, precision and progression at all costs.

If you’re already a fan of kettlebells, if you’re a fan of strength culture, in Simple and Sinister you will hear what you’ve heard before… in a refreshing, new and simplified way to reassure you that you’re already on the right path.

If you’re new to kettlebells, there isn’t a better starting point than Pavel’s. Unbelievably simple, yet the workouts and work that can be derived from this is absolutely sinister. It’s a concise read, with so many pearls. I’m on my second pass through and I will definitely do a third.

When an author, a coach, a philosopher or somebody who’s immersed themselves in physical culture like Pavel has with his presentation of the StrongFirst community and some of the previous work he’s done, takes the time to simplify his knowledge into clear, concise statements, you better put that on your shelf.

Don’t just read it and then run out to sell this information to your clients, because you’re just renting it. Do what he’s telling us. Embrace it. Just pick up the kettlebell, follow the rules and let it teach you. I can’t think of a better Christmas gift for some of my closest friends and the people in my family who like to train than for me to pick up a copy of this and get it over to them.

I would encourage you to do this read. It requires a lot of work to take something that produces significant results and turn its application into something so simple.

Well done, brother!

Gray Cook

Everything IS a Nail

$
0
0

By Pavel Tsatsouline, Chairman

At a recent SFG kettlebell cert Dan John and I were waxing poetic about the sheer perfection of a program of swings, goblet squats, and get-ups for anyone, from the proverbial “Edna” on Social Security to “GI Joe,” an Army Ranger barely old enough to buy a beer and brimming with testosterone.  One of the students respectfully asked: “Could it be that if the only tool is a hammer, every problem looks like a nail?”

Our answer was: every trainee IS a “nail.”  Some are sturdier than others, but all undoubtedly are in the “nail” family.  All members of our species share the same anatomy and physiology.  What works for one, will work for another.  The difference is in the degree: how hard you pound the “nail” and how heavy of a “hammer” you are going to select.

Edna and Joe may have different “sport-specific” goals.  She wants to be able to pick up her grandkid and to get up from the floor with no help and no groaning, should she decide to get down there to play with that grandkid.  She aspires to stand up from a chair spritely, to walk strongly, without fearing of falling and breaking her hip.

Joe’s goal is to be able to sprint with his 100-pound kit, quickly move in and out of different shooting positions, negotiate obstacles without blowing out an ankle or a hamstring, carry a wounded brother-in-arms.

Different as they appear, Edna’s and Joe’s goals rely on the same elements: mobile hips and knees, powerful legs, a stable trunk, a well “knit” body that moves as a unit, rather than a “collection of body parts.”  Once these general demands are met, specific skill practice may be needed—the Ranger needs to be taught how to correctly pick up a wounded comrade—but that becomes a piece of cake once the fundamental movement patterns are there, along with mobility and general strength.

There are many ways to develop these fundamental qualities.  For instance, one could take up yoga to get flexible (in spite of a decided lack of squat type poses), get strong with the powerlifts, and go to a physical therapist to attempt (in vain, unless his name is Gray Cook) to make everything fire the right way.  Edna might get her arm twisted into yoga, but Joe would just as likely take up interior decorating.  In turn, Edna would rather join a gun range than a powerlifting gym.  Joe would not mind.  Fortunately, many US military bases in most unfriendly places are equipped with barbells.  Unfortunately, the stress of nightly missions in Afghan mountains does not leave much adrenaline for heavy squats.  And when he tried it, Joe almost let his team down as he was hobbling at half speed with sore quads on a night raid.  It would not occur to either Edna or Joe to seek out the services of a physical therapist or some “movement coach.”

There are other ways, but most of them are just as cumbersome and unrealistic.  Enter the kettlebell.  Edna can easily afford one or two and Joe has them in his deployment kit.

The Swing, the Get-Up, and the Goblet Squat are the three most beneficial exercises anyone could do—period.  Some might need to add other moves, but they must be planted on the foundation of these three whales.

The Swing fills the hips with power and the back with vigor.  The Get-Up makes the shoulders resilient and the abs bulletproof.  The Goblet Squat unlocks the hips and puts a spring into one’s step.  Muscles appear in all the right places while the fat beats retreat.

When done correctly, these exercises are exceptionally safe.  They are beyond safe—they are “anti fragile,” to borrow a word from Nassim Taleb.  The Program Minimum plus goblet squats is true health training.  I can run out of fingers on both hands listing the various health benefits of swings alone.

“Customization” is just a euphemism for “differentiation” in the business world.  The only “customization” you need is the size of the bell.

You are the nail; I rend you the hammer.

The “hammer”: Pavel’s new book Kettlebell Simple & Sinister

Why a Kettlebell?

$
0
0

By Mark Reifkind, Master SFG

Why a kettlebell?

To bring out the athlete inside.

Kettlebells are seemingly everywhere these days in the fitness world. From magazines and internet articles to TV shows, these cast-iron balls-with-a-handle are making their way around the mainstream of fitness training. Celebrities, pro athletes and everyday people looking to shed a few pounds and get some muscle tone are looking to the kettlebell for some help.

It’s not like kettlebells are new. In use for at least 300 years, these weights and the basic techniques gained popularity in the Russian Military for being the most efficient way to get troops into fighting shape fast, and keep them battle ready on the field — with the minimum of equipment.

But it was ex-Soviet Special Forces (Spetsnaz) instructor Pavel Tsatsouline that introduced them to America in 1998 with his article “Vodka, Pickle Juice and Kettlebells” for Milo magazine, a strength journal for those interested in the most functional, serious training available.

And now it has come full-circle with the mainstream of the fitness public (all over the world) clamoring for as much information as possible about what this “low-tech, high-concept” tool can do for their own serious, functional training.

Kettlebell training is grouped into two basic types: ballistics and grinds. Ballistic kettlebell training revolves around swinging the weights (ballistics) as well as lifting the bells in a traditional manner (grinds).

When you swing the kettlebell, every part of the body is involved in each and every rep. Your body is always doing something; either producing force (swinging it up) reducing force (as it swings between the legs) or reversing the load (as one goes from the backswing to the next rep). This leads to very high workloads with much lower perception of effort. Add in the acceleration forces (3-5 times the weight of the bell) and even the average person can do extraordinary workloads in very short order!

Swinging the bells lets you work your cardiovascular and muscular systems at the same time and can burn upwards of 20 calories per minute, even with very light bells – a very efficient way to get in shape very quickly.

Add in the high-tension lifts such as the overhead press, the getup, and the squat, and one has more than a complete exercise program; they have a seriously state-of-the-art training program that will actually deliver the results it promises.

The essence of “functional” training is that is has a solid carryover to the real world. The body is indeed a linked, interconnected system and needs to be trained as such for maximum benefit. The kettlebell and our methods of swinging and lifting the bells maximize this functionality. Even picking the bells off the floor using the correct form will carry over to everyday life and make one stronger and more resilient in record time.

Plus, by sheer necessity, kettlebell training will help bring out the athlete inside you, even if you never played sport. Compelling in a way a treadmill or plate-loaded machine can never be, kettlebell swinging and lifting requires balance, coordination, core control, hand-eye coordination, and teaches the trainee to move as an athlete, hips first.

For most people, work capacity is perhaps the most important factor in their “fitness” life. The ability to perform the activities of your day and have a reserve at the end is vital. Nothing will improve your work capacity faster, or more safely, than kettlebell training. The combination of ballistic and grind lifts, done in many possible ways will increase muscle tone and strength, cardiovascular ability, and stabilize and strengthen the legs, hips, lower back, abs and shoulders in the quickest time possible — 20-30 minute workouts 2-3 times a week.

That’s not much, but kettlebell training is not easy.

Simple — yes, easy — no.

But growing up and growing old is not for sissies and kettlebell training will give you another component that’s essential for life as well as fitness: toughness. Both a physical and a mental toughness. Just by showing up and getting to know your kettlebell.

Even if all you do is pick it up and carry it, it will make you stronger, tougher and more resilient. But don’t just take my word for it, ask around. Ask the military, law enforcement, martial artists, and athletes around the world that put the kettlebell square in the center of their training. If it’s a fad, it’s been a long, 300-year one.

Yet for all its usefulness for the athletic Elite, the kettlebell’s basic moves, particularly the swing and the getup, are truly the People’s exercises. Practicing swings and getups on a consistent basis will yield results to the average person that they just couldn’t get from virtually any other kind of training. Because there is no impact, and the training has core, stability and balance training built into its foundation, it is some of the safest strength training a person can do.

And the cost of entry is very low. All one needs is one or two kettlebells and a 4’x6’ square of clear floor to practice. By the time you put your exercise clothes on and get to your car to start your drive to the gym, your kettlebell workout is over and you’re already a better man or woman.

Of course you should get basic instruction from a certified trainer, but that goes without saying as one enters into any new physical venture. Kettlebell training is not without its risk, but neither is being alive. Again, growing old is not for sissies.

Strength is the Master Quality. From strength all other fitness aspects are derived. Think about it. If one doesn’t have the strength to oppose the small force of gravity enough to stand up straight throughout the day, how important is their aerobic capacity?

Kettlebell strength is unique because kettlebell training builds useable strength. Basic strength. Functional, real-world strength. And, after you have that, everything else is easier.


Mark Reifkind, SFG Master Instructor, lives in Palo Alto, CA. You can learn more about him at his website or his blog: http://GiryaStrength.com, and http://Rifsblog.blogspot.com.


strength aerobics

$
0
0

By Pavel Tsatsouline, Chairman


Alexey Senart, SFG Team Leader

“Conditioning” is a very vague term—and it is for the better, given the scientists’ lack of understanding of endurance, its different facets, and the variables affecting it.

Fighters and other hard living types love killing themselves in the glycolytic pathway.  Because burn is painful and plain sucks.  But this is far from the only way to “condition”.  Enter the alactacid pathway plus aerobic recovery.  (Learn the basic science in the StrongFirst Roadwork blog.)

“Enjoy” the “strength aerobics” circuit by Alexey Senart, SFG Team Leader.  Take a kettlebell you can comfortably press ten times or so and do:

    • 1 left hand clean
    • 1 left hand military press
    • 1 left hand front squat (change stance if needed before squatting)
    • Park the bell
    • Shake off the tension with “fast and loose” drills
    • Repeat on the right.

Easy so far, right?

Shake off the tension with “fast and loose” drills, and keep going.  Select a pace you can sustain for a long time (a metronome might be helpful), and carry on.  For 10, 20, even 30min…

Alexey has found this to be a perfect “field” workout for those who frequently have to travel, be on military deployment or on vacation with one bell in the trunk.  You will maintain most of your strength while greatly enhancing your work capacity.  I suggest alternating the above with S&S day to day.

And if you are not traveling, have access to heavy kettlebells, and prioritize strength in your training, use the above workout as the light day for your presses and squats.


If you prefer “conditioning” with bodyweight, try the following workout Steve Maxwell and I designed for our students at a bodyweight course we were teaching almost a decade ago:

    • One-arm pushup, left x 1 rep
    • One-arm pushup, right x 1 rep
    • Pullup with the palms facing and the fists touching each other, emphasizing the left x 1 rep
    • Pullup with the palms facing and the fists touching each other, emphasizing the right x 1 rep
    • Pistol, left x 1 rep
    • Pistol, right x 1 rep

I go, you go—the 1:1 work rest ratio.  Shake off the tension while your training partner is working.  Ladder the works for 2 and then 3 reps—and start over.  Three rounds of (1, 2, 3) will get your attention.

We selected the strongest students in attendance—Yoana Teran (today SFG Team Leader) and Sarah Cheatham (formerly a Senior instructor in my old organization)—and put them through the paces.  Although stronger than most men and exceptionally conditioned with kettlebells, the ladies had to sweat to get through the circuit.  Even without the “burn” that traditionally accompanies “conditioning” circuits.

Android work capacity to you!


You can’t alternate with S&S unless you own S&S.
GET IT HERE


Simple and Sinister in a Rehabilitation Setting

$
0
0

By Travis Jewett, DC


In December 2013, I was a very fit and spry 32 years old. I had decided to volunteer with our local high school and youth wrestling programs. I wrestled for many years and thought I might have a nugget of wisdom or two to pass along to the younger generation. At the third practice I attended, I found I may have not been as resilient as I thought.

We were doing routine takedown drills and I was deep on a single leg. The kid sprawled hard. My left arm was trapped behind his knee and between his legs. As my left elbow reached hyperextension, I felt the snap. If any of you have ever experienced a complete tendon tear, you know exactly the feeling I am describing. It feels like ripping apart two pieces of Velcro at high velocity. The kid jumped back, looking at me standing there with my left arm dangling by my side. “You okay Doc?” he asked. My left biceps tendon had completely ruptured at the elbow. I slowly sat on the floor and told him to find a new partner. Then the worst part came. You sit there realizing you have to go home and explain this to your wife. As a person who makes a living with his arms, I am a chiropractor; I could imagine how this conversation was going to play out.

After I got past my lovely wife, I called a friend, an orthopedic surgeon, and we scheduled surgery for later in the week. The second call was to a good friend and mentor, Kelly Starrett. He had a Marc Pro sent to me to control the swelling and promote proper healing of the tendon and reduce disuse atrophy. We then formulated a plan to get me back in action. As anyone who has been through this before knows, the first ten days after surgery are spent in a cast. The cast covers your arm from knuckles to armpit and locks you at 90 degrees of elbow flexion. As a self-employed chiropractor, I did not have the luxury of time off. I could have written a book describing one arm chiropractic by the end of those ten days!

As our rehabilitation plan consisted mostly of holds and grip work and rewiring shoulder stability and mobility, I picked up my copy of Simple and Sinister and gave it another read. I have always seen an injury as your body demanding you return to the basics. There is something you were ignoring in your training and when your options for exercise and activity are limited you really learn a lot about yourself. I thought hard about how to make the necessary modifications given my current situation and went to work.

With my left hand I took the lightest kettlebell I own, 12kg, and would just lay there on the ground in the position of the Turkish Get Up (TGU) before you press it (remember, I’m in a cast). With my right arm I would just do floor presses with a pause at the top. I was not able to roll to my left elbow yet.

Anyone who has had surgery will tell you there is almost a loss of connection between your brain and the limb. I would switch between holding the kettlebell bottom down and bottom up with both hands. I realized I needed as much time under tension as I could handle. I would crush grip the kettlebell to help reengage my nervous system with the injured limb. This is where the value of the bottoms up kettlebell work is revealed. It would force me to engage the latissimus and reconnect my shoulder to my rib cage. I would follow it up with the 100 swings, 10 sets of 10, with a 24kg kettlebell. I would do all the swings with my right hand. This is not ideal, but I wanted to maintain some conditioning. Jumping rope and running outside were not an option. If you are familiar with Iowa winters, you know what I mean.

I also own several Captains of Crush grippers by Ironmind. I would take the #1 and use the grease the groove technique we are all so familiar with; several times a day squeezing it as hard as I could for 2 or 3 repetitions. I truly believe the ten days I spent doing as much as I could with the cast on were pivotal in my overall recovery. I believe too many people are scared to do very much during this phase.

 At day ten I had my appointment to have my cast removed. The surgeon could not believe how well I had healed. The next phase involves a very cumbersome brace from wrist to shoulder that limits your flexion and extension at the elbow. Most importantly, I was able to roll onto my left elbow and begin to transmit force through my shoulder girdle. Many people forget the importance of the arm without the kettlebell. It needs to be in perfect position to handle the load of your body. It also allowed me, ever so slightly, begin to move the left arm under load.

This phase of rehab became extremely tedious. You are allowed to open the brace 10 degrees in each direction every couple weeks until you have full range of motion. As I opened the brace, I would do more and more with the left hand, slowly working to a full floor press. In the world of rehab there are hundreds of different exercises that are given for “scapular stability” and “rotator cuff strengthening.” News flash, the brain works in patterns, not muscles. Most rehab fails to work the motor patterns.

Following this simple progression, I was able to work mid-range flexion and overhead positions (flexion with external rotation) when I was holding the kettlebell in my left hand. When I had the kettlebell in my right hand, I was able to work on loading that shoulder in extension and internal rotation. The big one is rewiring your trunk stability. As I opened the brace more and more, it was so difficult to roll properly with my left hand holding the kettlebell. It was even difficult without any weight! I could bore you with more details but I think as the reader you can see where this is going. At my last appointment with my surgeon the first week of February, I was able to do a full Simple and Sinister routine using a 12 or 16 kg kettlebell with my left hand for TGU depending on how I felt.

The TGUs were extremely valuable in my recovery but do not forget about the swings. As I could straighten my arm to an acceptable degree, I began doing two handed swings. While we all know the swing is a very elegant hip hinge exercise, we forget how important it is for practicing packing the shoulder in a dynamic environment; relearning to transition between stiffness and relaxation. It is crucial for patterning your breathing and creating a stiff torso; both are extremely important in developing a strong platform for your shoulder to work correctly. It also added time under tension for my grip. I also began adding in some jump rope work and several different carries (waiter’s walks, bottoms up, front rack, etc.). Creating a stable spine and shoulder and moving was another skill I found very helpful in recovery. There were several soft tissue and joint mobilization techniques I used, as well as the Marc Pro device, which are beyond the scope of this article. You are more than welcome to research Kelly’s work or attend one of our courses for more information.


The surgeon could not believe where I was from a recovery perspective at my last appointment. I was by no means totally healed, but I was cleared to start doing other things. Anyone who has experienced a complete tendon rupture knows the recovery process is really 12-18 months. Although I have introduced other activities to my routine, TGUs and swings remain a staple. I did not mention this earlier, but this was my fourth surgery (both shoulders, both elbows). Revisiting the basics of human movement is exceedingly important to me for long term health. I am at 13 months post-surgery and constantly return to the TGU when I feel something is not right with one arm or the other. I can usually trace it back to not bracing properly before the initial roll. There is a pearl of wisdom there and many of you may have missed it. If your spine is not stable and your trunk is not stiff and engaged, your shoulder will not work properly. There may be some joint restriction, but if you do not work on spine stability first, you will not get to the bottom of it.

I will finish with a caveat. I am a healthcare professional with many good friends in the field of strength and conditioning and rehabilitation.  I also have many years of experience in weight training and injury care and prevention. If you have torn your distal biceps tendon, seek advice from physicians and physical therapists who understand basic weight training. If your doctor does not deadlift or gives you a funny look when you say Turkish Get Up, find a new doctor. With the current rehabilitation environment where I live, had I not understood how to use the principles of tension, grease the groove, and how to work on motor patterns and movements, I would not have been as far along at discharge.

Contact organizations like StrongFirst or Functional Movement Screen or one of the staff members at our company, MobilityWOD. We may be able to put you in touch with providers in your area who understand the lifter. There is a gap between healthcare providers and the strength and conditioning communities that needs to be narrowed.


About the Author

Dr. Travis Jewett is a Chiropractor, MobilityWOD Team Member and CrossFit Level 1 Trainer. He travels and teaches the CrossFit Mobility Certification as part of the seminar staff. He has been involved in weight training, powerlifting, teaching and coaching for 22 years. He works with a wide range of people at his clinic in Northwest Iowa. Currently on hiatus from competing, he always goes back to picking up his kettlebells. He can be reached at travis@mobilitywod.com.

The StrongFirst Courses and Certifications, as well as the book Simple and Sinister are great ways to learn the methods described in this article.

Military Deployment Prep: A Program for Hardening the Soldier

$
0
0

by Al Ciampa, MS, SFG, FMS, ACSM, USAW

When Pavel asked me to make a contribution for an article, I was honored. His request was made in a forum post discussing the preparation of a combat unit for the mountains of Afghanistan. As military deployment prep is more or less what I do professionally, I thought I would provide an overview of my philosophy, as well as expand on the ideas from that forum thread.

Al Ciampa StrongFirst

Al Ciampa knows how to handle military deployment prep.

Prior to a discussion of training prep, let me share what I have come up with as a general algorithm of movement foundation that not only allows the military elite to perform better, but also works well with the unhealthy population I serve as part of my profession. You’ve heard this all before and there is nothing new here, but I’ve witnessed this algorithm solve a lot of problems.

Step 1: Crawl

In the very fitting “crawl, walk, run” method of training in the military, the first step is crawling. Tim Andersen and Geoff Neupert of Original Strength turned me on to this. Now, we teach proper diaphragmatic breathing, and then use crawling to train it. It’s difficult to breathe into the chest and shoulder girdle while your upper body is dynamically loaded in this fashion.

Get up on your hands and feet and crawl forward and reverse as part of the warm-up. It doesn’t require a long distance, but does require a certain technique. As Anderson and Neupert explain: keep your butt down, chin and chest high, move the opposite limbs together, and strive to pull the knee outside the elbow as high as it can go.

Our best crawlers move slowly and their limbs move almost independent of the pelvis and spine. Crawling is the foundation of movement and accomplishes everything I see most people spend hours attempting to attain: distracting with bands, foam rolling, stretching, “mobility” work, more bands, etc. But crawling achieves all the same goals in a fraction of the time. Remember, military application – there are many more things to worry about other than PT.

Step 2: The Get Up

Once you own the ability to crawl (though you can surely work on both together), start practicing the get up as described by Pavel in Simple & Sinister. Seek to transition gracefully between positions, own each position when there, and push the loading up as you develop your get up.

Where crawling ties Dan John’s knots together, provides mobility, and offers body control, the get-up does the same under slow loading. Recently, I had a 6’2”, 240lbs lean and strong (powerlifting) airman get crushed by a 16kg bell in the get-up and fail to crawl with any sort of control. If this is you, go back and rebuild the chassis.

Step 3: The Swing

The swing now takes your graceful movement under slow loading and turns flesh into steel through ballistic loading. Again, you should refer to Pavel’s work, so I won’t repeat what’s been said. These three skills don’t have to be ordered, except that if you can’t crawl well, maybe spend more time crawling and less time doing get-ups and swings, and do them with lighter loads. If you’re not graceful with your get-ups but crawl well, ease off on the swing loads for a bit. You’ll be surprised to see how these three skills work off of each other, and improve almost together.

The Specifics: Military Deployment Prep

Okay, let’s get to the meat: more bang for the buck – this is the overall theme for a military application. Yeah, it’s awesome, all of the sexy exercises we have to choose from, between CrossFit and Arnold’s encyclopedia, but if a movement is superfluous or unnecessary, then ditch it.

Swings

One-hand swings should be performed as described in Simple & Sinister. Two-hand swings have to be overspeed. But here’s my version, an excerpt from my training manual:

“A proper swing is a tug-of-war between the opposing body lines: posterior v. anterior. The glutes, hamstrings, and quads forcefully catapult the bell forward, while the lats, abdominals, and hip flexors catch it and throw it back—compress the posterior spring, fire the spring, compress the anterior spring, fire that spring, then do it again. Both the hinge and plank position are maximally tight—maximum feed-forward tension—for the time the bell spends flying out, one is “relaxed- tight”.

Throw the bell from the coiled spring of the hinge into the tight plank—stay connected to the bell—”catch” it in the plank and throw it back down. Recoil the spring and snap back to plank. Repeat for a set of 10. Check your heart rate. Wow.

Most people have a lot of trouble with this when they first start swinging—just get the basic pattern down and be patient. Use an appropriate load. My progression to this very violent overspeed swing is to train a floater swing first—the default swing of the StrongFirst community. Floater swings consist of driving the hips explosively, throwing the bell into a tight plank, however, the bells ascent is not arrested but is allowed to “float” momentarily at the top of the arch. The bell should then be guided back down into the hinge without too much effort. These swings concentrate on hip extension power.

It is important to train this initial version of the swing before you begin to overspeed them—train them until you’ve burnt the motor program into your brain, perhaps about 3-6 months. Hear this: if you include over-speed swings into your training too early, that is, before you can float swings gracefully and powerfully, without much thought, you will degrade the mechanics of both swing types and get no where at best, injury at worst. Be patient, put your hours in on the floaters, then include a few overspeed swings as you progress.

A word on sit-ups here: I don’t advocate training sit-ups regularly, in fact you should only perform them on test day. If folks performed sit-ups properly, then there is a possibility that they wouldn‘t cause problems. However, most do not perform them correctly, especially under testing situations, and so even a short stint in the Military can lead to life-long low-back pain. Sit-ups place the lumbar spine against the ground to be used as a fulcrum to fold the body in half over—something it did not evolve to support. If you do sit-ups properly—that is, keep the midline open and lead the action from the chest, only flexing only at the hip—then the most you’ll probably get is a sore tailbone. But that technique costs a lot of energy and requires a lot of strength, so most members I monitor perform them in trunk flexion followed by hip flexion—and there’s where the problem exists. Do your heavy-ish swings to improve your sit-up numbers.


Use the swings in the Simple & Sinister fashion with a twist: 10 x overspeeds, 10 x right, 10 x left, for 3-4 total rounds (90-120 total swings). Do these 3-5 times per week. I even like this swing session after a long ruck.

Foot March

You can’t get around LSD work for aerobic capacity, from fatty acid metabolism to mitochondrial function, these “loaded carries” for distance harden the body and prep the physiology for the future environment. Pavel talks about “losing weight without the dishonor of aerobics,” and I agree, but don’t take it out of context. Here, we’re prepping for function, not fooling around on a stair master watching Oprah.

It is not clear if power work (re: Simple & Sinister) alone provides physiological changes in mitochondria that contribute to the conditioning increases.1 A controlled carbohydrate diet, too, does not offer changes at the mitochondrial level, but does increase the efficiency of fatty acid use.1 We do, however, know that LSD training at low heart rates, as per Lydiard/Maffetone, increases mitochondrial volume and output, and so, endurance performance.2

So, you can run slow for distance to get the effect or you can walk quickly with a load for distance to get the same effect. Put a heart rate monitor on, ruck fast, and then run slow. Then compare your numbers. You’ll find the same aerobic effect from the two training efforts. So, let’s use the one with the secondary benefits that allow for peak performance in the specific environment we face. There is no substitution for efficient fat metabolism and mitochondrial function while under load in a mountainous environment.

Two walks per week are the minimum – one short, quick, and heavy; and one long, lighter, and slower. Use the short one to work the balance between the glycolytic and oxidative systems, and to prep the body for the daily loaded patrolling. Use the long one to really stoke the fires of the oxidative system. Keep your heart rate low and push it out for five or six hours.

Military Deployment Prep Program

The swings and walks will cover all the bases for power, endurance, and energy systems training. The heavy get-ups will take care of your strength work. Crawling will fill in the holes in most people’s movement. There’s the minimum.

If you have time and resources, do the deadlift, military press (use the single-arm kettlebell press), and pull-ups. Find Pavel’s Power to the People and do timed singles. These work well for strength and save time. Do this two to four times per week – and use the appropriate loads. See Easy Strength. If you have more time, sub out one or two of the swing workouts for five to ten minutes of long cycle clean and jerks or snatches – or roll the dice, as in Enter the Kettlebell.

Sample Week

Monday:

  • Crawl
  • Deadlift
  • Get-ups
  • Swings

Tuesday:

  • Crawl
  • Short walk
  • Press
  • Pull-ups

Wednesday:

  • Crawl
  • Deadlift
  • Get-ups
  • Swings or Clean and Jerks or Snatches

Thursday

  • Long walk
  • Optional: Swings

Friday

  • Crawl
  • Deadlift or swings
  • Presses or get-ups
  • Pull-ups
  • Sprints: 10 x 100m or 7 x 200m or 5 x 300m or 3 x 400m
  • Recover between efforts. Don’t do sprints if you chose swings over deadlifts.

What About Running, Push-Ups, and Sit-Ups?

Most units in prep do two sessions per day, so split these up as you see fit. What, no running, push-ups, or sit-ups? You’re not going to be doing much running overseas, so don’t fall into the, “We’ve always done this, so we’re gonna do this” mentality when it comes to running. I’ve already discussed sit-ups, and if you’re not scheduled to take a PT test, you don’t need to waste your time with push-ups.

Now, understand that push-ups are a specific enough event that if you don’t practice, you won’t nail your best numbers on the test. But your swings and get-ups will keep you close, so not much practice is required before the test. Just practice your high-tension techniques as you move (Pavel’s Irradiation concept), and your push-up muscles will stay in shape assisting the movements in the program. (Of course, don’t consciously stay tight while crawling or foot marching – this is reflexive tension).

Conclusion: What’s Critical for Military Deployment

There’s my take on deployment prep: applicable, minimalist, and effective – backed with both science and experience. Crawling is critical. The swings are critical. The heavy get-ups are critical. The walks are critical. Not necessarily in that order. Some variation of this has worked well for me and for those I’ve advised for many years now.

References:

  1. Hopeler, H., & Fluck, M. (2003). Plasticity of skeletal muscle mitochondria: Structure and function. Medical & Science in Sports and Exercise 35(1) 95-104.
  2. Seiler, S., & Tonnesen, E. (2009). Intervals, thresholds, and long slow distance: The role of intensity and duration in endurance training. Sportscience 13(1) 32-53.

Al Ciampa has been a barbell athlete for 25+ years; a former powerlifter and bench press specialist, he has a raw bench press of 605lbs in training and 585lbs in competition, at the time, setting an IPA record. He served in the US Army first as a LRS-D team member, then as director of the Army’s hand-to-hand combat program in South Korea: Modern Army Combatives Program. After his service, he co-opened and led training for a fitness and health & wellness center, specializing in strength & conditioning, and nutrition that served Military units and the local public. Feeling a want to support the Military again, he now works as an exercise physiologist and health educator for the US Air Force, specializing in rehabilitation, strength & conditioning, nutrition, and instructor development. He has a MS in sports and health science; certified SFG I, FMS, ACSM, and USAW; and has been recognized for excellence by the Secretary of Defense, Mr. Chuck Hagel.

“Losing Weight Without the Dishonor of Aerobics.”KETTLEBELL SIMPLE & SINISTER

The post Military Deployment Prep: A Program for Hardening the Soldier appeared first on StrongFirst.

Simple & Sinister: Getting from Two- to One-Hand Swings

$
0
0

By Steve Freides, Senior SFG

Adding one-hand kettlebell swings to your Simple & Sinister training can be daunting for some people. Some of the symptoms include:

  • Grip – you feel like the bell is going to fly out of your hand.
  • Posture – you feel unable to maintain a forward-facing torso when the weight is in one hand.

First things first – there is no magic solution to your problem. You aren’t strong enough yet at one-hand swings. But since you feel more than able to complete the number of two-hand swings the program gives, you need a way over this particular hump.

Performing your single-hand swings with a lighter weight is one option – and a good option, but not necessary for most people if you have first reached the program’s requirement by using only two-hand swings. Instead, try the approach I’ve outlined below – and finally let go of that extra hand.

One-hand swing

Learn to let go and achieve your one-hand swing.

How to Read This Swing Program

Within a single set of 10 repetitions, mix two- and one-hand swings. I credit Master SFG Brett Jones with introducing this concept to me.

Here is your first set of 10 reps – shorthand explained in a moment:

  • 2T +  2L +  2T +  2R + 2T

That’s 2 two-hand, 2 left hand only, 2 two-hand, 2 right hand only, and 2 two-hand to finish.

Note: I drove five hours and paid for a hotel in order to attend a four-hour workshop by Mr. Jones, and then arranged for him to work with me one-on-one afterward before I got back into my car for the five hour drive home. If you need in-person instruction, make no excuses – look up an SFG in your area and arrange a training session or get yourself to the nearest SFG if none are nearby.

Why You Will Mix Two- and One-Hand Swings

The reason you will mix single-arm and double-arm swings in a single set is to allow your two-hand swing to “teach” your one-hand swing. Feel the amount of explosiveness in your two-hand swing; note the “float” you achieve at the top of each rep; acquire a feeling for how long you wait before moving your hips out of the way of the descending bell, and for quickly you change the bell’s direction at the backmost place in the swing – and now try to duplicate these things in your one-arm swing.

It goes without saying that most people will find one side works better than the other, so also allow your strong side to learn from your stronger side. Note: we don’t have a “weak” side at StrongFirst, only a strong side and a stronger side. Thank you, Master SFG David Whitley, for that perspective.

Why two reps? A single rep each side isn’t going to be enough to let you get a feel for how you’re doing with your one-arm swing on that side – but two will suffice.

How to Follow This Kettlebell Swing Program

Perform as many of your sets of 10 in the above format as you feel appropriate for your current level of prowess at the one-arm swing. If you are doing 5 sets of 10, try it for your second set before returning to two hands for the remainder.

You do not need to wait until you are doing 10 sets of 10 two-hand swings before introducing the one-armed swing to your training. Try a little, see what you think, continue to perform one-arm swings if your good judgment says this is an option for you.

A Sample Progression

One way to increase the intensity of your swing workout – and therefore to make progress – is to keep the rep count and set count the same but increase the number of one-hand swings. You might progress like this – each line represents a single day’s swing workout.

  1. 50: 10T x 5 (10 two-hand swings x 5 sets)
  2. 50: 10T x 1, 2T+2L+2T+2R+2T x 1, 10T x 3 – one set, 4 one-arm swings
  3. 50: 10T x 1, 2T+2L+2T+2R+2T x 2, 10T x 2 – two sets, 8 one-arm swings
  4. 50: 10T x 1, 2T+2L+2T+2R+2T x 3, 10T x 1 – three sets, 12 one-arm swings

Then, at your next workout:

  1. 70: 10T x 7

In the last workout above, you have temporarily abandoned the one-arm swing as you perform a greater total volume. When you feel ready, you may then start adding one-hand swings back into your 70-total swing workout, and so on.

Workout Math

At some point along the way, you may feel confident enough in your one-arm swing to want to do more than two a time. Bravo! Make it so! You need to be able to count to ten, and add a string of numbers that equals ten, in order to do this. If that’s a problem for you, spend some time working on arithmetic, please.

  • 2T + 3L + 2T + 3R = 10 reps

The above yields 6 single-arm swings out of 10 instead of the previous total of 4 single-arm swings.  A 50% increase per set – nice!

A further increase would be:

  • 1T + 4L + 1T  + 4R = 10 reps

We’re now at 8 single arms swings out of 10 – you’re almost there, and moving to all one-arm swings is sure to be in your near future.

Mix and Match

Note that all these intermediate formats can be mixed. Below is a single workout, with each set on a separate line for clarity. 50 reps, pyramiding the number of one-arm swings

  1. 10T x 1
  2. 2T + 2L +2T +2R + 2T
  3. 2T + 3L + 2T + 3R
  4. 2T + 2L +2T +2R + 2T
  5. 10T

You’ll have finished 50 swings with 14 single-handed.

Conclusion

Feel free to switch left and right hands in everything above – find which order works best for you, or switch between them if both sides are fairly equal and you can keep track.

The instant feedback you receive when switching between two- and one-hand swings can be an extremely valuable tool in your quest for the ultimate explosive expression of the final Simple, and eventually the final Sinister workout in Pavel’s Kettlebell Simple & Sinister. Pay attention to your form on every rep, and use what you can already do well to help you improve the movement patterns at which you aren’t as strong.

I hope this helps you achieve your goal – please drop a note on the StrongFirst discussion forum to tell me of your progress.

Dr. Steve Freides

The post Simple & Sinister: Getting from Two- to One-Hand Swings appeared first on StrongFirst.


Simple & Sinister Training for Kettlebell Sport Athletes

$
0
0

By S. H. Mathews

If perfection is found when there is nothing more to take away, then Simple and Sinister is much closer to it than the program minimum from Enter the Kettlebell. Swings and getups. Clear numbers, clear goals, a crystal-clear progression.  Nothing to take away, but plenty of room to add other work to meet one’s goals.

Simple and Sinister is designed to augment an athlete’s primary training. It is designed to add strength and conditioning to the training regime of a martial artist, tactical operator, powerlifter, or other athlete. What about athletes who compete in kettlebell sport? Is Simple and Sinister a good fit for those athletes?

Pavel Tsatsouline does the kettlebell swing.

Pavel demonstrates the hardstyle swing.

Hardstyle vs. Sport-Style

A distinction is often made between hardstyle lifting and sport-style lifting. This distinction is often amplified by those who have no strong grasp of either style. Yes, they are different approaches to lifting kettlebells, but they are not contradictory or mutually exclusive. 

In hardstyle lifting, the athlete applies maximum or near-maximum force to complete each lift. In sport-style lifting, the athlete applies just enough force to complete the rep, saving his energy for the next rep. And the next. And the one after that, for up to ten minutes.

There are differences in technique as well, in accordance with the different goals of the two styles of lifting. There is not a good style and a bad one, or safe and unsafe, or strong and weak. Just as a hardstyle karateka can benefit from practicing Judo, or a powerlifter may supplement his slow-grind deadlifts with explosive power cleans, sport-style lifters can benefit from hardstyle training. Depending on their goals, hardstyle lifters may find that sport-style lifting is beneficial for them as well.

The Qualities Needed for Kettlebell Sport

The question to ask about any assistance program is whether it will provide physiological qualities necessary and useful for one’s primary sport. What does a competitive girevik need? If I had to reduce it to a minimum, I’d say cardiovascular endurance, an explosive lower body, and a stable upper body.

Cleans, jerks, and snatches are powered by the legs and caught by the arms in the rack or overhead. The legs and hips are the prime movers. A strong core links the lower body to the arms for the pulls of the clean and snatch, and for the launch of the jerk. When the weight has been launched by the legs, it is caught by the arms in the lockout position. Explosive legs, stable shoulders, strong core. Lungs and heart that can handle the workload. Add grip endurance, and you have most of the physical qualities a competitive girevik needs.

What S&S Can Give the Kettlebell Sport Athlete

The staple movement in S&S is the heavy one-arm swing. I won’t give the program away here, but it calls for a high volume of one-arm swings in a short period of time, and encourages men to work up to a heavy kettlebell — 48k is the master plan.

Hardstyle one-arm swings build strong legs and hips that can extend explosively time and time again, just like the girevik needs for jerks, snatches, and cleans. Done in sufficient numbers, they build grip endurance. Simple and Sinister swings are harder and faster than anything most competitive kettlebell athletes will do on the platform. They make the legs stronger and faster. They carry over well to the more measured pace of competition lifting. They are to the girevik what sprinting is to the middle distance runner. When I’m doing S&S swings my heart rate regularly exceeds 186 beats per minute, and I’ll hit triple digit swing reps in under five minutes with a 32k bell. It makes long cycle with a pair of 24k bells seem almost easy. Almost.

The other movement in Simple and Sinister is the get-up. Again, the plan tells the athlete to go heavy and get strong, and to compress rest periods. The get-up restores tired shoulders and builds strength and stability overhead — just where the competitive girevik needs it. Snatches, jerks, and long cycle all require solid, stable lockouts. Many competitions are now electronically scored, so a solid, motionless lockout from the bells to the ground is more important than ever. If they wobble around, the lift does not count. Weak, inflexible shoulders lead to premature fatigue, inefficient technique, and lost reps. The get-up builds upper body stability, particularly through the shoulder girdle, which every lifter needs on the platform.

Explosive lower body power, flexible upper body stability, a grip that won’t let go, and a heart and lungs that keep driving. These are things the competitive kettlebell athlete needs, and Simple and Sinister delivers. I’ve found it to be a great addition to my sport training. Typically, I’ll do a five to seven minute set of long cycle clean and jerks with 2x24k, rest for less than five minutes, then the Simple and Sinister program with a 32k. All the benefits of both hardstyle and sport-style lifting, in under 25 minutes a day.

A Complete Kettlebell Sport Program

While Simple and Sinister can be a great addition to a competitive girevik’s arsenal, it should not be the only accessory work done. Practicing the competitive lifts builds the qualities needed for domination on the platform, and Simple and Sinister reinforces these qualities, but most top gireviks find they still need some steady-state cardio — running, rowing, biking, skiing — whatever floats your boat.

Twenty to twenty-five minutes seems to be the sweet spot — enough cardio to power you through a ten minute set on the platform, but not so much that you compromise strength and power gains. I recommend alternating steady state cardio and Simple and Sinister on days after sport-specific training, or incorporating steady-state cardio at least two days a week.

S. H. Mathews is a competitive kettlebell lifter and martial artist. He holds the rank of Candidate for Master of Sport from USA Kettlebell Lifting. When not lifting kettlebells he teaches for several colleges, universities, and seminaries. 

The post Simple & Sinister Training for Kettlebell Sport Athletes appeared first on StrongFirst.

Posture: An Easy Way to Up Your Performance

$
0
0

By Pavel Tsatsouline, Chairman

Posture in AthletesWhat do the above photos of top performers in three totally different sports have in common?

Posture

  • What would happen to the sprinter if she were slouched over? A waste of her remarkable muscle power.
  • The full contact karateka’s devastating spinning kick would turn into a harmless wobbly spinning top.
  • The archer would not be able to align her structure for a perfectly stable shooting platform.

In a great majority of athletic events and real-life tasks, a ramrod straight posture, or at least its approximation, greatly improves the efficiency. So get your carcass rebalanced.

Don’t Row Yet

A common recommendation for improving posture is to row. Yet you can row until you are blue in the face, but unless you have excellent thoracic mobility, you will fail to balance out your development and could get hurt in the process.

Does it make sense to load a movement one cannot perform without extra load? Would you put a barbell on the shoulders of a person who cannot do a single competent bodyweight squat? The answer, of course, is no. By the same token, if you are unable to open your chest up with no external resistance, you should not be rowing with weights.

First: Soft Tissue Work

You need to overcome the fascia’s and other tissues’ internal resistance first. Various soft tissue work will help. So would a stretch with a yoga block.

Lie down on the floor with a wooden block the size of a brick under your upper back. The block is strategically placed at a specific spot to ensure you are stretching where it should. You need to hang out there for a long time to allow your shortened tissues to “ooze” over the block. The head is supported by a folded towel that limits cervical extension and lets one hang out longer. Many minutes later, slowly roll to your side rather than sit up.

There are subtleties to this. You are well advised to see a yoga expert.

Yoga Stretch for Posture

Abby Clark, SFG, demonstrates the drill and comments: “While resting on the yoga block, take a moment to make sure your rib cage is stacked over your hips. While you press your rib cage down, make sure your pelvis is not tucked underneath and your low back is touching the floor. Now that your ribs and pelvis are in the correct position, you can relax your arms down on the ground while diaphragmatically breathing to deepen the thoracic spine opener.”

Kettlebell Drills

Two powerful posture improving drills from the SFG curriculum are the kettlebell arm bar and the windmill.

Then: Strengthen the Position

Once you have sufficient passive flexibility to have good posture—you can assume the posture, you just cannot hold it long—it is time to strengthen the right muscles. This is where rows and such come in. But chances are, you will not even need to bother with rows and will get the job done with the kettlebell ultra basics alone, the goblet squat and the one-arm swing from Kettlebell Simple & Sinister. The goblet squat forces you to raise your chest and the swing pulls the shoulder blades together and extends the entire posterior chain, from the base of your skull to your heels.

A little attention to opening yourself up will go a long way toward getting more speed, strength, precision, and endurance out of your muscles—with no added effort. As a martial arts master said, “Posture is balance and balance is power.”

The post Posture: An Easy Way to Up Your Performance appeared first on StrongFirst.

Simple & Sinister Progression Tactic

$
0
0

By Pavel Tsatsouline, Chairman

Today we will discuss some nuances of your Kettlebell Simple & Sinister progression, inspired by lively discussions on the StrongFirst forum.

Kettlebell Simple & Sinister bookIn a nutshell, the program calls for 10×10 one-arm swings (five sets per arm), with the goal of eventually being able to do them in five minutes with a particular size kettlebell any time. It does not mean you should strive to hit your 100 swings in five minutes in every training session, though.

Al Ciampa, SFG, pointed out:

Training for an event, or competition is always different from the event itself: the intensity is usually lower, the distance or time is shorter/less, etc. But, our contemporaries would have you believe otherwise. So, in the current fitness context of boot camps, insane training programs, high-intensity this and that… well, of course, you are going to compete (read: try for the S&S goal) every session.

But in the same way that you do not run the marathon until the actual race… do not attempt the time standards of S&S until your “training is complete”. This “training” consists of many months, possibly years, of lower intensity swings and get-ups, i.e., training to your breath, HR, talk test, etc. No clock, no sense of urgency, no rush. Let the training provoke adaptations in your mind and body, then, and only then, apply those adaptations to the competition: the S&S time goal.

In the beginning, when the kettlebell is light, you might be able to do your 100 swings in five minutes every day. But as your poundages climb, an organic form of cycling tends to develop to comply with the non-negotiable rules of S&S: stay fresh every day and explosive every set. You can do it by training aerobically most of the days – that is resting long enough between sets to pass the talk test.

The Science Behind Simple & Sinister

Belying its apparent simplicity, S&S happens to have some fascinating science under the hood. Back in the 1980s, Soviet scientists and coaches, Prof. Yuri Verkhoshansky among them, pioneered “anti-glycolytic training” for various endurance events. Where the prevailing approach of dealing with the “burn” of accumulating lactic acid was—and still is—exposing the athlete to ever more intense acid baths, the Soviets had a radical thought: what if we arrange the training in such a manner that the muscles do not produce and accumulate so much acid?

Early efforts concentrated on “putting anaerobic glycolysis in a vice,” as one coach put it, of two other energy systems, alactic and aerobic. The former is responsible for the first twenty seconds or so of a powerful effort before anaerobic glycolysis and the “burn” kick in. Training methods were developed to beef up the alactic “tank” and improve aerobic recovery.

Although these experiments were successful, the above adaptations are fairly limited. It was not until the Soviet Union fell apart that anti-glycolytic training or AGT was revolutionized by Prof. Victor Selouyanov. He discovered how to make the fast and intermediate fibers aerobic.

What gives the slow fibers their endurance are the little organelles called mitochondria. Mitochondria allow one to efficiently produce energy for muscle contractions with the use of oxygen, aerobically. Selouyanov found a way of installing these aerobic machines into fast fibers!

Note: Before we continue, it must be stressed that developing mitochondria in a fast fiber does not make the fiber slower or weaker. Members of the Russian national judo team who have had tremendous success with anti-glycolytic conditioning routinely bench press 1.75-2 times their bodyweight.

Russian national judo team

The Russian national judo team implemented anti-glycolytic training with great success.

Although some recent studies claim to know the answers, the exact cellular mechanisms that turn on mitochondrial growth are not yet known. But Selouyanov figured out the stimuli responsible for turning these mechanisms on. He learned that it is the total time a muscle fiber spends in mild fatigue and acidity that presses the button.

Applying Science to a Simple & Sinister Progression

Runners are familiar with this effect when their slower fibers grow some more mitochondria from training just below the anaerobic threshold. The AnT refers to the exercise intensity when lactic acid accumulation suddenly starts speeding up. Training right below this threshold produces the desired condition of mild local fatigue/acidity.

In fast fibers, the same effect can be achieved by carefully changing the loading parameters in interval training: briefer and more powerful work; longer and active rest. You must stop each set of a high power exercise at the point where the alactic tank is starting to run low but anaerobic glycolysis has not had the time to rev up all to full speed—typically at ten to twenty seconds. Then you must rest longer than what you are accustomed to in order to permit the fatigue and the acid to dissipate. The rest must be active—walking around, jogging, “fast and loose” drills, etc. Easy movement speeds up the elimination of acid.

Prof. Selouyanov sums up mitochondria producing AGT:

…every muscular contraction must be performed with a near-maximal intensity but average intensity of the exercise should not exceed the anaerobic threshold power. In this case all muscle fibers are active in the exercise but, thanks to regulation of the rest pause and the period of muscular relaxation, complete clearance of metabolic products of anaerobic glycolysis must be assured.

This is where the talk test comes in. American research showed that the highest exercise intensity at which you can still talk comfortably places you slightly below the An—if you are not sure whether you are comfortable or not, you are at or slightly above the AnT. (You can also use a heart rate monitor to optimize your Kettlebell Simple & Sinister training intensity instead of the talk test. Al Ciampa, SFG and I tell you how in this blog.)

Now what happens if you rest less, and start your next set while you are still huffing and puffing? Presumably, the mitochondria growing machinery comes to a halt or at least slows down. The endurance you are developing will be more glycolytic in nature and your body composition will be improving through different physiological mechanisms.

Applying the Science to Your Training

There are pros and cons of glycolytic training (I have touched on them briefly in the past and will expand in the future). The most immediate con is the inability to sustain high quality daily training and to have high energy and readiness. Decades ago, the Soviets recognized that predominantly glycolytic training is most stressful to the endocrine system and thus can easily lead to overtraining. Or at least make you feel sore and tired, which is at odds with the stated goals of S&S.

In summary, your Simple & Sinister progression tactic is:

Most of your S&S sessions do not rush the clock and wait until you can pass the talk test before your next set. On the last session of each week push harder and occasionally all out and test yourself.

The post Simple & Sinister Progression Tactic appeared first on StrongFirst.

Simple & Sinister + Heart Rate Training

$
0
0

By Al Ciampa, SFG and Pavel Tsatsouline, Chairman

In the Simple & Sinister Progression Tactics blog, you learned how to accelerate your Kettlebell Simple & Sinister progress by optimizing your training intensity with the talk test. But there is another, more accurate way to monitor your rest periods besides the talk test: heart rate (HR) training.

Your HR, or pulse, is a rough indication of your current level of stress, including the work that you are performing. If you “work to an HR,” you will provide a metric to the conditions that you can compare over time.

heart rate training with the kettlebell

Heart rate training can take Simple & Sinister to a new level.

Heart Rate Training as Applied to Simple & Sinister

First, you must find your target heart rate. There are many ways to do this, but the easiest and likely the most applicable to the population is “180-your age” by Dr. Phil Maffetone. In this case (swing intervals), you may add 5 BPM to your “180-age” result to get your target. Whatever your target HR, you must not exceed this during your session.

So, 180 – your age + 5 = target HR.

Next, you will notice that when you perform your swings, your HR will spike somewhere between 5-15 seconds after you complete your set, and may or may not linger around this value. This is the task: ensure that these spikes do not exceed your target HR.

This takes some practice. So, do a set of swings and observe the monitor. Do another set of swings, and again, observe the reading on the monitor. In a bit of time, you will get the feeling for what your starting HR must be – “the HR observed on the device before a set” – to ensure your HR does not exceed your target during the spike after the set. A few preparatory sessions will suffice for discovering the dynamics of your heart’s response to exercise.

The initial work sets of your session will require some time to elevate your HR. The heart’s rate lacks in response to work, initially. Do not interpret this as a free ride to do more swings until your HR spikes. You will regret it. Rest appropriately between sets for the initial few minutes of the session. Again, your own practice will teach you more than we can. As a personal experiment, take your swing session out to 20-30 minutes one day, in sets of 10, using the above instructions, and observe how your HR dynamics change.

The Importance of Tension in Heart Rate Training

There are many external factors that can affect your HR values: heat, humidity, hydration level, medications, illness, stress level, sleep, etc. However, the most important one within your control is the tension you use during your swings—its magnitude and timing.

High tension will spike the HR, but total tension at the lockout is non-negotiable—this is hardstyle. But this tension does not need to be maintained throughout the set, except in heavy double swings that are no longer ballistic; they are what Jeff O’Connor called “fast grinds.”

One can find moments of relative rest during the float and the backswing, which will lower the HR without compromising the swing’s power. After the kime, power your plank down. Keep just enough tension to maintain your structure and protect your spine. Just like a fighter who maintains a moderate brace between strikes, just in case, but maximizes it only on impact.

Cranking tension up and down in a blink of an eye is not an easy skill to acquire. Be patient. It might turn out that to keep your heart rate from exceeding the “180 minus age” ceiling after a set of 10 swings, you are forced to use a very light kettlebell.

If this is the case, use a favorite StrongFirst tactic of cutting the reps and upping the sets: instead of 10×10, do 20 sets of 5 reps. Peter Park, a strength and conditioning coach who has most of the elite he trains do Simple & Sinister-type swing sessions, comments:

In the swings I would expect their heart rates to stay below max aerobic even when doing 10 hard swings (some will be able to do more). In the beginning of the base building 5-ish is what most people can do. My goal is to get 10 hard swings on the min while staying aerobic. I put a HR monitor on and keep track. Not only do I like to see the max aerobic ceiling, but as the athletes get deeper into the base training, their heart rates drop incredibly fast, often to 90 or 80 at the end of the minute. I can often gauge when an athlete is ready for a break from racing or speed training when this swing test and other max aerobic tests start to decline.

You will have an easier time keeping your session aerobic while using a heavier weight. This format will subtly change the benefits—more power gains, a little less muscle hypertrophy, and a greater ability to quickly relax your muscles after contractions. When ready, move up to 14 sets of 7 reps (98 total), and eventually 10×10.

The Progression

Once you have spent a number of sessions locking down your technique, tension level, and starting HR, you will likely notice you are able to do more work under the same HR as time goes on. This is improvement.

Russian sports science differentiates training loads between “external” and “internal.” The former refers to doing so many reps, with so much weight, with this much power, this little rest, etc. The latter reflects the internal cost of the external load. In the type of training discussed in this blog, the HR reflects the internal load. If you can get through your 100 reps in less time without compromising the swing quality and at the same heart rate, then you have gotten in a better shape.

Some folks begin to see improvements right away; others will require more time. It is unlikely you will progress all the way to the “sinister” goal by following your HR in training. Occasionally, you will need to compress your rest periods and go glycolytic.

The post Simple & Sinister + Heart Rate Training appeared first on StrongFirst.

How to Prepare for and Pass Your SFG Level I

$
0
0

By Anna Cannington, SFG I

If attending the SFG Level I certification has entered your mind as anything from a dream to a plan, you have some work to do. Training for this certification takes a lot of focus and dedication. But it doesn’t have to be grueling, beat-you-up hard work – in fact, it shouldn’t be.

Successfully completing your SFG Level I takes smart planning and execution. While there are many ways to get there, you really just need to find the advice and plan that resonates with you. This article describes my path to a successful Level I in May 2015 and the eight-week training plan I followed, designed by SFG Al Ciampa.
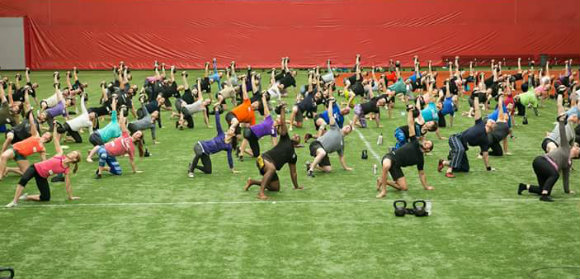
StrongFirst certification at The Dome

A look inside a StrongFirst certification.

The Challenge of the SFG Level I

When I decided to go for the certification, I knew it would be a challenge. Although I love kettlebell training, I also work a desk job, I’m in my late forties, and I had a relatively short history of strength training. The cert weekend sounded intimidating: two long, hard days of learning and drilling and a third day of testing. Candidates need to demonstrate competence in the swing, press, clean, squat, get-up, and snatch after twenty-plus hours of hard work – and then pass the five-minute snatch test!

But when the time came for my certification, all went well. I was able to focus on and soak up all the expert instruction we received. My team leader, Senior SFG Dr. Mark Cheng, said I was extremely solid, and my team assistant, SFG II Leslie Branham, commented, “Rarely do people come in as prepared as you were. You looked like you were re-certifying!” But others in attendance struggled through the drills, found it hard to pay attention, and worried about the testing. Many did not leave with a certificate in hand.

It’s so important to prepare well, in order to earn your certification and get the most out of the weekend. As SFG II Mark Limbaga commented to one candidate online, “If you did the work, you will absolutely have fun.”

Long-Term Training

The eight weeks of short-term training was not actually my starting point. I can see, looking back, that it was important I had a solid aerobic and strength base, adequate mobility, and basic kettlebell skills going into this short-term training. These elements take many months or even years to develop depending on your starting point. I’ll describe a few areas I feel were most beneficial.

1. Aerobic Base

I’ve been a recreational cyclist for many years, and I maintain aerobic conditioning with several hours of bike riding each week. Five years ago I did a structured three-month base training program. Dedicating time to build a solid aerobic base seems to have elevated my ability to train ever since, both on and off the bike.

Other options for aerobic conditioning include jogging, rowing, and ruck marching. If you prefer to spend your time with kettlebells, be sure to check out StrongFirst’s new alactic plus aerobic (A+A) training protocols. Whatever the mode, the benefits of aerobic training are well documented.

2. Mobility

Your mobility and movement quality may need a lot of work, especially if you spend many hours at a desk or if your physical training has not been well-rounded. Unrestricted hips, shoulders, thoracic spine, hamstrings, and ankles all contribute to what you can do in movements like presses, get-ups, and goblet squats. If your body can’t move properly, you will be limited when you work on both basic and advanced skills.

Many SFGs recommend a movement screen such as a Functional Movement Screen (FMS) when you start out. This provides you with a baseline record of your current ability and a reference point for progress. Wherever you start, improvement is definitely possible, but it’s important to give yourself enough time. You can’t rush this process.

3. Basic Kettlebell Work

This also ties in with mobility, as the kettlebell is a great tool for practicing movement quality. I attended kettlebell class just once a week for almost a year before I ramped it up. The classes I attended were led by Al Ciampa and his team, and focused on movement quality and practicing the basic skills: goblet squats, farmer’s carries, swings, and get-ups. The emphasis was always on mastery of the basics. This slow start helped me learn to integrate the body as one piece and develop foundational skills, i.e., posture, breathing, and tension before moving into more advanced skills.

Tip: StrongFirst Kettlebell and Bodyweight one-day user courses are also extremely helpful in preparing for the SFG. I attended one of each and would highly recommend both for anyone who is able to attend.

4. Strength Base

I followed Pavel’s Kettlebell Simple & Sinister (S&S) for four months, at six-to-ten months prior to my cert. It got me strong. Daily practice sessions with S&S dialed in my swing and get-up, and laid a foundation for squats, snatches, cleans, and presses.

The S&S program offers strength, stamina, bulletproof shoulders, and a unique style of training that allows you to self-study the nuances of working with the kettlebell. A few dedicated months of S&S should get you able to work with a weight that is heavier than your snatch test-sized bell, which is important because you want your standard weight to feel “light” when you arrive for cert weekend. I was regularly practicing S&S with 24kg, which made the 16kg feel relatively easy.

Bonus: If you know and understand the S&S book, you will have an easier time with the SFG course manual and written test. (Yes, some candidates pass everything except the written test. Be sure to read your manual during your cert weekend!)
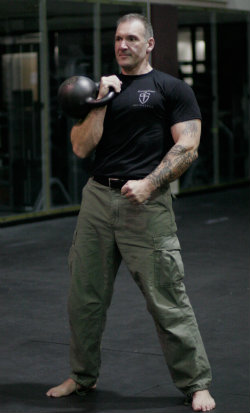
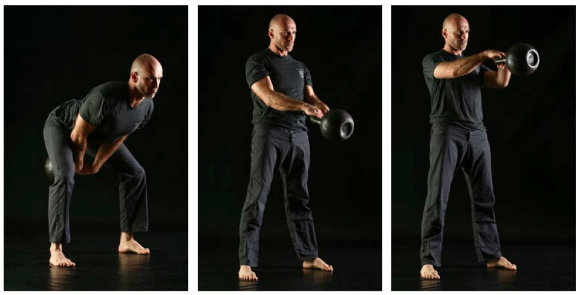
Get up at StrongFirst certification

Perfecting technique at the SFG Level I.

Short-Term Training

As you ramp up your training leading up to certification, there are many potential pitfalls:

  • Doing too much: overtraining and injury.
  • Not doing enough: at best, excess suffering and anxiety; at worst, not passing.
  • Doing the wrong things: doing weeks of snatches because you are fixated on the snatch test.

The best way to avoid these pitfalls is to have a good training plan. The eight-week SFG-prep targeted training plan outlined below is the plan I followed. Although Al wrote this plan with my abilities and goals in mind, I think it may work well for others. If you choose to use it, keep in mind that your snatch test-sized kettlebell depends on your gender, age, and weight. Mine is 16kg. Also, at plan start, my deadlift 1RM was 225lbs, and I could press a 20kg as a 1RM. This may provide a frame of reference.

The plan is quite simple: four sessions per week of sixty to ninety minutes each. The plan is eight weeks long, counting down to Week 0, the week of certification. The earlier weeks focus on strength, and the later weeks focus on conditioning. You may notice that there are no snatches in the plan until four weeks out, but don’t worry – it works. I wanted to avoid a high volume of snatches in training because of minor shoulder issues, and this plan had me gliding in for a smooth landing with an easy 100 snatches in 4:30 in both my final training session and my snatch test.

Keep in mind the density of training in the conditioning sessions is important. There are specific rest intervals prescribed for both the swing and snatch. When the plan says “rest: 20” or “rest: 10” between sets, there is a world of difference there. Pay close attention to the plan – and your clock – during these sessions.

A warm-up before each session is important, as the exercises listed assume you are prepped and ready. Some days you will need more movement preparation than others. Good options include Original Strength resets, crawls, bottoms-up work, and the warm-up routine from Pavel’s Kettlebell Simple & Sinister.

SFG Level I Preparation Program by SFG Al Ciampa

Week 8

Session Exercise Notes
1 Single presses: 6 x (5 press ea side@ 12kg)

1H swings: 16 x (10 swings OTM @ 20kg)

Farmer’s walks: 4 x (90 sec @ “heavy”)

“OTM” means swing on the minute, so there will be just over 40 sec (:40) rest between sets of 1-hand swings, alternating sides. 90 sec farmer’s carries are hard; use as heavy a weight as you are able.
2 Deadlifts: 3 x (5 lifts @ 155lbs)

Get-ups: 5 x (1 get-up ea side @ 24kg)

Double cleans: 5 x (5 cleans @ 16kg)

Double front squats: 5 x (5 squats @ 16kg)

These deadlifts are a relatively light weight; about 70% of 1RM. Alternate sides with the get-ups, as with S&S. Double clean and double front squats can be done as a complex, or in separate sets.
3 Single presses: 10 x (5 press ea side @ 12kg)

1H swings: 20 x (10 swings OTM @ 20kg)

Farmer’s walks: 4 x (90 sec @ “heavy”)

Larger volume of presses, but the weight is still light. Swings also relatively light, but a long session.
4 Deadlifts: 10 x (1 lift @ 165lbs)

Get-ups: 5 x (1 get-up ea side @ 24kg)

Double cleans: 5 x (5 cleans @ 16kg)

Double front squats: 5 x (5 squats @ 16kg)

I did 2 sets of 5 kettlebell deadlifts @ 40kg to warm up for barbell deadlifts. Rest :30-45 between deadlift singles.

Week 7

Session Exercise Notes
1 Single presses: 5 x (5 press ea side @ 16kg)

1H swings: 24 x (10 swings OTM @ 20kg)

Farmer’s walks: 4 x (90 sec @ “heavy”)

Work on tension with the presses. These swing sessions take a while; allow enough time to complete everything.
2 Deadlifts: 3 x (5 lifts @ 155lbs)

Get-ups: 5 x (1 get-up ea side @ 24kg)

Double cleans: 5 x (5 cleans @ 16kg)

Double front squats: 5 x (5 squats @ 16kg)

If able, add some additional pauses in the get-up (especially standing position, 5-10 sec). If feeling fresh/strong, can go up a weight on cleans and/or front squats. Rest as needed.
3 Single presses: 7 x (5 press ea side @ 16kg)

1H swings: 20 x (10 swings OTM @ 20kg)

Farmer’s walks: 4 x (90 sec @ “heavy”)

Larger volume on presses; adjust weight down if needed.
4 Deadlifts: 10 x (1 lift @ 180lbs)

Get-ups: 5 x (1 get-up ea side @ 24kg)

Double cleans: 5 x (5 cleans @ 16kg)

Double front squats: 5 x (5 squats @ 16kg)

Don’t forget to add a pause at the bottom of the squat; this does make them harder, but is required at the cert. Grunt as you start the ascent.

Week 6

Session Exercise Notes
1 Single presses: 10 x (5 press ea side @ 16kg)

1H swings: 26 x (10 swings OTM @ 20kg)

Farmer’s walks: 4 x (90 sec @ “heavy”)

Very large press volume. Do what you can; rest between sets. This session is quite long.
2 Deadlifts: 3 x (5 lifts @ 155lbs)

Get-ups: 5 x (1 get-up ea side @ 24kg)

Double cleans: 5 x (5 cleans @ 16kg)

Double front squats: 5 x (5 squats @ 16kg)

Session 2 is pretty standard throughout the weeks.
3 Single presses: 10 x (5 press ea side @ 16kg)

1H swings: 24 x (10 swings OTM @ 20kg)

Farmer’s walks: 4 x (90 sec @ “heavy”)

More presses. A day of rest prior to this session is helpful. Swings should be good and powerful throughout the set.
4 Deadlifts: 10 x (1 lift @ 195lbs)

Get-ups: 5 x (1 get-up ea side @ 24kg)

Double cleans: 5 x (5 cleans @ 16kg)

Double front squats: 5 x (5 squats @ 16kg)

A few easy practice snatches might be a good way to finish this session. They’ll be coming up soon.

Week 5

Session Exercise Notes
1 Single press ladders: 4 x (1, 2, 3 press ea side @ 20kg)

1H swings: 30 x (10 swings OTM @ 20kg)

Farmer’s walks: 4 x (90 sec @ “heavy”)

Moving up a weight in presses and moving to ladders: 1L, IR; short rest; 2L, 2R; short rest; 3L, 3R; longer rest; repeat 4 times. Mix in the lower weight as needed, if unable to complete with the heavier weight.
2 Deadlifts: 3 x (5 lifts @ 155lbs)

Get-ups: 5 x (1 get-up ea side @ 24kg)

Double cleans: 5 x (5 cleans @ 16kg)

Double front squats: 5 x (5 squats @ 16kg)

Use a heavier weight for one or two of the get-ups, if feeling up to it.
3 Single press ladders: 5 x (1, 2, 3 press ea side @ 20kg)

1H swings: 30 x (10 swings OTM @ 20kg)

Farmer’s walks: 4 x (90 sec @ “heavy”)

Allow adequate recovery between press ladders. Recovery between sets of swings may be improving now. The farmer’s carries will give you a good cool-down.
4 Deadlifts: 10 x (1 lift @ 210lbs)

Get-ups: 5 x (1 get-up ea side @ 24kg)

Double cleans: 5 x (5 cleans @ 16kg)

Double front squats: 5 x (5 squats @ 16kg)

Heavier lifting today, at the end of a hard week.

Week 4

Session Exercise Notes
1 Single press ladders: 5 x (1, 2, 3 press ea side @ 20kg)

1H swings: 14 x (10 swings @ 24kg; rest :60)

Farmer’s walks: 4 x (90 sec @ “heavy”)

Swings with the heavier weight may take a few sets to get used to. Notice the rest is: 60 between sets, which is slightly more rest than OTM.
2 Deadlifts: 3 x (5 lifts @ 155lbs)

Get-ups: 5 x (1 get-up ea side @ 24kg)

Double cleans: 5 x (5 cleans @ 16kg)

Double front squats: 5 x (5 squats @ 16kg)

A standard Session 2; these should be routine by now; time to really focus on quality movement.
3 Single press ladders: 5 x (1, 2, 3 press ea side @ 20kg)

Snatches: 5 x (10 L + 10R @ 16kg, rest :20)

Farmer’s walks: 4 x (90 sec @ “heavy”)

This first snatch session may feel very hard. Video of the snatch set helps to review what you actually did (it is easy to lose count). Farmer’s carries are tough after snatches.
4 Deadlifts: 10 x 1 @ 225lbs

Get-ups: 5 x (1 get-up ea side @ 24kg)

Double cleans: 5 x (5 cleans @ 16kg)

Double front squats: 5 x (5 squats @ 16kg)

Last heavy deadlift day. I was unable to get these lifts, so backed off for a lighter set.

Week 3

Session Exercise Notes
1 Single press ladders: 5 x (1, 2, 3, 4 press ea side @ 20kg)

1H swings: 16 x (10 swings @ 24kg; rest :45)

Farmer’s walks: 4 x (90 sec @ “heavy”)

This is a lot of presses with the heavier weight. Allow plenty of time for this session and rest several minutes between ladders as needed. Notice rest interval for swings is shorter.
2 Get-ups: 5 x ea side @ 24kg

Double cleans: 5 x (5 cleans @ 16kg)

Double front squats: 5 x (5 squats @ 16kg)

2H swings: 10 x (10 swings @32-40kg, rest :60)

No more deadlifts, but adding some heavy 2-hand swings. Deep recovery breathing between sets is helpful.
3 Single press ladders: 5 x (1, 2, 3 press ea side @ 20kg)

Snatches: 5 x (10 L + 10R @ 16kg, rest :15)

Farmer’s walks: 4 x (90 sec @ “heavy”)

This was the first time I was able to do all presses w/ the 20kg. Snatches performed with less recovery, but felt easier. Start to think about a strategy for the test; cadence, rest, and hand switches.
4 Get-ups: 5 x (1 get-up ea side @ 24kg)

Double cleans: 5 x (5 cleans @ 16kg)

Double front squats: 5 x (5 squats @ 16kg)

1H swings: 20 x (10 swings @ 24kg; rest :30)

Difficult swing set; 20 sets with the heavier weight, and only: 30 rest. Last session of the week, so a good time to give it all you have.

Week 2

Session Exercise Notes
1 Single press ladders: 5 x (1, 2, 3, 4, 5 press ea side @ 20kg)

1H swings: 16 x (10 swings @ 24kg; rest :20)

Farmer’s walks: 4 x (90 sec @ “heavy”)

This day I split up into two sessions; presses in the morning, swings and farmer’s walks later in the day. I initially tried the swings, but just didn’t have it in me after all those presses!
2 Get-ups: 5 x (1 get-up ea side @ 24kg)

Double cleans: 5 x (5 cleans @ 16kg)

Double front squats: 5 x (5 squats @ 16kg)

2H swings: 5 x (20 swings @32-40kg, rest :30)

I felt strong this day and decided to test my 1RM deadlift; new PR of 240lb. Maybe it’s a good day to try; use your judgement. Heavy 2H swings again, and this time 20 per set; these are HARD!
3 Single press ladders: 5 x (1, 2, 3 press ea side @ 20kg)

Snatches: 5 x (10 L + 10R @ 16kg, rest :10)

Farmer’s walks: 4 x (90 sec @ “heavy”)

This rest interval on the snatches may get you in under 5:00. If you are anxious about the test, try your planned strategy for this session and see how you do.
4 Get-ups: 5 x (1 get-up ea side @ 24kg)

Double cleans: 5 x (5 cleans @ 16kg)

Double front squats: 5 x (5 squats @ 16kg)

1H swings: 14 x (10 swings @ 24kg; rest :20)

Clean and front squats should feel easy by now. Swing session has a short interval again, which makes it feel like a snatch session.

Week 1

Session Exercise Notes
1 Single press ladders: 5 x (1, 2, 3, 4, 5 press ea side @ 20kg)

1H swings: 10 x (10 swings @ 24kg; rest :10)

Farmer’s walks: 4 x (90 sec @ “heavy”)

Last day of high volume presses. You will be glad you put in the time on these. On this session, I noticed that the 5th ladder felt the same as the first. Swings are very difficult with the :10 rest, but a good rush!
2 Get-ups: 5 x ea side @ 24kg

2H swings: 5 x (20 swings @32-40kg, rest :30)

Aim for smooth and graceful on the get-ups. Swings might feel a little better than last week, but still very difficult!
3 Single press ladders: 5 x (1, 2, 3 press ea side @ 20kg)

Snatches: 5 x (10 L + 10R @ 16kg, rest :10)

Farmer’s walks: 4 x (90 sec @ “heavy”)

If you haven’t hit your snatches in 5:00 in any of the sessions yet, definitely go for it today. My strategy: 10x each hand throughout; 60 continuous, then :20 rest, then 40 continuous to finish.
4 Get-ups: 5 x (1 get-up ea side @ 24kg)

Double cleans: 5 x (5 cleans @ 16kg)

Double front squats: 5 x (5 squats @ 16kg)

1H swings: 10 x (10 swings @ 24kg; rest :10)

Last hard session. Use a heavier weight for get-ups and/or cleans and front squats for this last session if you feel up to it, but be smart! No injuries now…

Week 0

Session Exercise Notes
1 Single presses: Easy set

1H swings: 10 x 10 @ 20kg, nice and easy

It’s all about “easy” this week leading up to the cert weekend. A variety day works fine too; just keep the weight moderate and the volume light.
2 Get-ups: 5 x (1 get-up ea side @ 24kg)

Double cleans: 5 x (5 cleans @ 16kg)

Double front squats: 5 x (5 squats @ 16kg)

Moderate work.
3 Groove whatever you feel like Mobility and variety; keep it light.
4 Rest and travel Now, the hard work pays off!

The sessions can be completed at whatever time and day of the week works best for you. A rest day between session two and three each week is helpful. The only other training I did was one bike ride on the weekend. I had no soreness, injuries, or setbacks during this period and felt great throughout.

As training load is accumulating, it’s important to get adequate sleep and nutrition, and assist recovery in whatever way you find most helpful: massage, foam rollers, stretching, etc. I found it easy to get distracted by the intensity of training and preparation. It helps to periodically go to a yoga class or whatever “soft” practice (in the words of Senior SFG Steve Freides) works for you.

As you progress through the plan, have your technique reviewed by an SFG certified instructor. While you can expect to be adjusted at the cert, you don’t want to have to make major changes on game day. Trying to undo bad habits and build new ones in 72 hours can scatter your attention, and you may miss opportunities to soak up the finer points that will enable you to effectively teach others. Strive to dial in your technique to all the standards outlined on the StrongFirst site in advance of your cert.
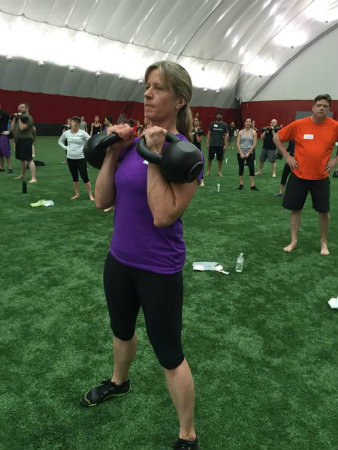
Anna Cannington SFG Level I

Having a great experience at my SFG Level I.

How My Cert Played Out for Me

As I arrived at The Dome the first morning, I thought, I am SO glad I prepared. This is going to be great. The first day, I think we did over a thousand swings! I thought, this was the reason for a lot of swings in my training. As we learned and practiced get-ups, I thought, it’s a good thing I am so comfortable with this that I could do it in my sleep, because there are a lot of moving parts and you have to get every step just right.

The second day, we performed presses, and more presses, and yet more presses, and I thought, all those presses ladders, high volume, and working with the 20kg are really paying off. Sets of five would never have been enough. As the weight got heavy for cleans, squats, and snatches, I thought, lots of work with a weight heavier than the one I am required to use was a good idea.

On the third day, I realized I hadn’t had to take any pain meds, and thought, that’s a definite sign that I trained right, at my age! When the time came for the snatch test, I thought, I am so glad I have done this more than once with plenty to spare. I know how to get this done even, though it is the third day and we are fatigued. For the skills tests I thought, no problem. Just do what you’ve learned and practiced with those small adjustments you have learned here. As I started the written test, I thought, good thing I spent the last two evenings reading the manual! At the grad workout I thought, I am glad I built a strong work capacity, because this is purely AWESOME! And finally, as Dr. Cheng handed me my SFG instructor certificate, I thought, wow, I am so glad I did this! What an amazing day!

Anna Cannington Kettlebell InstructorThe SFG is an incredible journey. Not only the certification weekend, but everything you will do along your journey toward that goal. It is truly a life-changer. So, dedicate yourself to a well-planned preparation, and enjoy the ride.

Anna Cannington works full-time in the Information Technology field. She began training with kettlebells in 2013 and became a certified instructor (SFG I) in 2015. She currently instructs kettlebells to group classes as well as one-on-one training with students at Keesler Air Force Base in Biloxi, MS. She is working on a personal trainer certification through the National Academy of Sports Medicine and intends to pursue further certifications with StrongFirst.

Photos courtesy of Mandy Whitley.

The post How to Prepare for and Pass Your SFG Level I appeared first on StrongFirst.

Program Minimum [Squared]

$
0
0

By Jon Engum, Master SFG

In his original kettlebell book, Pavel Tsatsouline talks about a Program Maximum and a Program Minimum. For the younger people in the crowd (read: newer to kettlebells) some explanations may be needed.

The (R)evolution of the Program Minimum

The Program Minimum has it roots with the Russian communist coup. Here is a little background:

“The 1903 congress also adopted the party program, consisting of two parts: minimum and maximum. The two parts of the program corresponded to the two revolutions that Russian Marxists were to prepare for. The minimum program set the task of achieving a bourgeois-democratic revolution, in which the workers would aid the bourgeoisie to overthrow tsarism and establish a democratic republic. The maximum program planned for a proletarian-socialist revolution in which the workers would seize power from capitalists and establish the dictatorship of the proletaria.” (courtesy of allrussias.com)

In the context of the home budget, the program maximum would include everything from food, housing, transportation, education, retirement, etc. The home budget program minimum would include only the minimum things needed for survival.

1. Water — Food
2. Shelter

Pavel took this minimalist concept and applied it to kettlebell training. While it would be ideal to have a more complex/comprehensive training program, many people do not have the means in both time and expertise to stick to that kind of training protocol. A Program Minimum with 100% compliance is much more effective, producing greater results than a complicated, time-consuming program with only 50% compliance.

The big question was: What drills would provide the biggest bang for your training buck?

Answer: 1 Grind and 1 Ballistic — Sculpted to Perfection

The original Program Minimum grind was the bent press and the ballistic was the snatch.
Many of us who started at the beginning of the kettlebell revolution grew up on a steady diet of this plan. However, it did not take long to realize that while these are great selections, for the average beginning kettlbell practicioner, these moves may be a little out of reach.

The bent press and the snatch demand a level of shoulder mobility that not many beginners have access to. Never one to rest on his laurels, Pavel reinvented the Program Minimum with two equally-effective drills: the swing and the get-up. With some instruction, most trainees can access the new plan without the prerequisites of the originals.

In Pavel’s words:

“The Bent Press is an exceptional lift for an advanced minimalist — but most people simply do not have the patience to build up to it. The get-up, while missing out on some of the bent press’s benefits, delivers a number of additional benefits. And, unlike the bent press, trainees of any level can benefit from it.”

Simple and Sinister was born.

The following is a plan to combine both Program Minimums into your class structure and a way to ensure that even beginners can patiently develop the correct technique. This PM2 is scalable and can be taught in a group setting, even if the skills of the group members are widely varied.

What I am about to give you is a “one-stop-shop” template that will be appropriate for the rawest recruit yet challenge the most seasoned among your students.

Exercise Genus

While the full bent press, snatch, get up, or even swing may be too challenging for a newbie, there are drills that lead to the development of these skills that anyone can handle. The first thing we need to do is get a hierarchy of drills in the same family or genus as the target exercise. Here are my choices listed from easiest to hardest.

Program Minimum – Part A – Swing

SWING GENUS

Program Minimum Kettlebell Swing

Fabio Zonin, Master SFG

1. Kettlebell Deadlift
2. Dead Stop or Power Swings
3. Two-Hand Swings (two hands, one bell)
4. One-Hand Swings (one bell, one hand)
5. Hand-to-Hand Swings
6. Double Swings

Program Minimum — Part B — Getup

GETUP GENUS

Program Minimum Get-up

Mark Cheng, Senior SFG

1. Arm-Bar
2. Floor Press
3. Naked Get-ups
4. Partial Get-ups (to a tall sit)
5. Tactical Lunge
6. Full Getup

Retro Program Minimum — Part A — Bent Press

BENT PRESS GENUS

Program Minimum Bent Press

David Whitley, Master SFG

1. Bent Arm Bar
2. Half Kneeling Bent Press
3. Low Windmill
4. High Windmill (bell in top hand)
5. Bent Press
6. Two Hands Anyhow


Retro Program Minimum — Part B — Snatch

SNATCH GENUS

Program Minimum Snatch

Jon Engum, Master SFG

1. One-Hand Swing
2. High Pull
3. Dead Stop or Power Snatches (touch and go)
4. Tempo Snatches (vary time in lockout)
5. Heavy Snatches (2-3 reps with a 5 rm size bell)
6. Double Snatches

This is my list. You may have others or you may think that a three is harder than a four, but that is not the point. The take-home lesson here is a list of six drills for each movement in the order from easiest to most challenging, and there is some room for interpretation.

One more point: If you are reading this and do not know how to do any of the above drills, you are required to find an SFG Certified Instructor in your area and get some lessons!

THE PLAN: MIXOLOGY FOR PM2

The plan calls for training four days a week.

Monday: PM

  • Pick 2 drills from the Getup Genus and 2 drills from the Swing Genus. Alternate between grinds and ballistics.
  • Beginners should feast on a steady diet of 1s and 2s.
  • Intermediate Students should focus on 3s and 4s as well revisiting 1s and 2s
  • Advanced Students can play with 5s and 6s

Tuesday: Retro PM

  • Pick 2 drills from the Bent Press Genus and 2 Drills from the Snatch Genus.
  • Beginners focus on 1s and 2s
  • Intermediate 3s and 4s
  • Advanced 5s and 6s

Wednesday: Off

Thursday: Repeat Monday

Friday: Repeat Tuesday

Note to Instructors: When your new student has a good grasp on the 1s and 2s, then slowly introduce the higher level drills. They will have already seen your advanced members practicing them. So you will have some built-in retention.

To quote a student of Cole Summers SFG Team Leader and Former Team Canada Strength Coach: “Coach, when I master a new move it changes me completely.”

TIMING

How much time or how many reps should you put in to each drill? You can play this by feel, but remember to vary the load from training session to training session. Or if you have a strong foundation and have learned all the drills in your list. then try what I outline below. It will add some randomness to your training and also a bit of fun.

I borrowed the following idea from an article Pavel wrote sometime back called ETK PLUS:

Get a pair of dice. Roll one die, this will determine your first drill.

Example: If you roll a 4 on swing day, look at the swing list and find #4, you will be doing one-handed swings.

Next roll both dice. This will give you the practice time.

Example: roll an 8 and you are working for 8 minutes on one-handed swings, shoot for about 80% effort.

Roll a die again and get a 6 and you will be working on get-ups.

Roll two dice and get a 4 and you will be practicing for 4 minutes.

Repeat the rolls again for your second swing selection and second getup selection.

We have had great success with this simple program and I am sure you will as well.
Program Minimum2 – Double the fun, double the results!

Jon Engum is a Master SFG Instructor and a 7th Dan Kukkiwon Certified Grandmaster. Engum is the author of Flexible Steel, Creator, Chief Instructor of the Flexible Steel System, owner of Engum’s Academy, Engum’s Taekwondo Association, Jon Engum’s Extreme Training and is a Vice President of the Minnesota Taekwondo Association. He has presented and lectured on several continents and teaches Workshops, Courses and Instructor Certifications worldwide.

The post Program Minimum [Squared] appeared first on StrongFirst.

Simple and Sinister in a Rehabilitation Setting

$
0
0

By Travis Jewett, DC


In December 2013, I was a fit and spry 32 years old. I had decided to volunteer with our local high school and youth wrestling programs. I wrestled for many years and thought I might have a nugget or two of wisdom to pass along to the younger generation. At the third practice I attended, I found I may have not been as resilient as I thought.

How My Injury Occurred

We were doing routine takedown drills and I was deep on a single leg. The kid sprawled hard. My left arm was trapped behind his knee and between his legs. As my left elbow reached hyperextension, I felt the snap. If any of you have ever experienced a complete tendon tear, you know the feeling I am describing. It feels like ripping apart two pieces of Velcro at high velocity.

The kid jumped back, looking at me standing there with my left arm dangling by my side. “You okay, Doc?” he asked. My left biceps tendon had completely ruptured at the elbow. I slowly sat on the floor and told him to find a new partner. Then, the worst part came. You sit there realizing you have to go home and explain this to your wife. As a person who makes a living with his arms, I am a chiropractor; I could imagine how this conversation was going to play out.

Simple & Sinister and My Rehabilitation Plan

After I got past my lovely wife, I called a friend, an orthopedic surgeon, and we scheduled surgery for later in the week. My second call was to my good friend and mentor, Kelly Starrett. He had a Marc Pro sent to me to control the swelling and promote proper healing of the tendon and reduce disuse atrophy.

We then formulated a plan to get me back in action. As anyone who has been through this knows, the first ten days after surgery are spent in a cast. The cast covers your arm from knuckles to armpit and locks you at ninety-degrees of elbow flexion. As a self-employed chiropractor, I did not have the luxury of time off. I could have written a book describing one arm chiropractic by the end of those ten days!

As our rehabilitation plan consisted mostly of holds, grip work, and rewiring shoulder stability and mobility, I picked up my copy of Simple & Sinister and gave it another read. I have always seen an injury as your body demanding you return to the basics. There is something you were ignoring in your training, and when your options for exercise and activity are limited you can learn a lot about yourself. I thought hard about how to make the necessary modifications given my current situation and went to work.

My Rehabilitation Progressions

With my left hand I took the lightest kettlebell I own, 12kg, and just laid there on the ground in the position of the Turkish get-up before the press (remember, I’m in a cast). With my right arm, I did floor presses with a pause at the top. I was not able to roll to my left elbow.

Anyone who has had surgery will tell you there is almost a loss of connection between your brain and the limb. I would switch between holding the kettlebell bottom down and bottom up with both hands. I realized I needed as much time under tension as I could handle. I crush gripped the kettlebell to help reengage my nervous system with the injured limb. This is where the value of the bottom-up kettlebell work was revealed.

Bottom-up work forced me to engage the latissimus and reconnect my shoulder to my rib cage. I followed it up with the 100 swings, 10 sets of 10, with a 24kg kettlebell. I did all the swings with my right hand. This was not ideal, but I wanted to maintain some conditioning. Jumping rope and running outside were not an option. If you are familiar with Iowa winters, you know what I mean.

I also own several Captains of Crush grippers by Ironmind. I took the #1 and used the grease-the-groove technique we are all so familiar with. Several times a day, I squeezed that gripper as hard as I could for two or three repetitions.

At day ten, I had my appointment to have my cast removed. The surgeon could not believe how well I had healed. I truly believe the ten days I spent doing as much as I could with the cast on were pivotal in my overall recovery. I believe too many people are scared to do much during this phase.

Out of the Cast and Into the Brace

The next phase of my rehabilitation involved a cumbersome brace from wrist to shoulder that limited my flexion and extension at the elbow. But, importantly, I was able to roll onto my left elbow and begin to transmit force through my shoulder girdle. Many people forget the importance of the arm without the kettlebell. It needs to be in perfect position to handle the load of your body. So this brace also allowed me, ever so slightly, to begin to move the left arm under load.

This phase of rehab became extremely tedious. You are allowed to open the brace 10 degrees in each direction every couple weeks until you have full range of motion. As I opened the brace, I would do more and more with the left hand, slowly working to a full floor press. In the world of rehab, there are hundreds of different exercises given for “scapular stability” and “rotator cuff strengthening.” News flash, the brain works in patterns, not muscles. Yet, most rehab fails to work the motor patterns.

Following this simple progression, I was able to work mid-range flexion and overhead positions (flexion with external rotation) when I was holding the kettlebell in my left hand. When I had the kettlebell in my right hand, I was able to work on loading that shoulder in extension and internal rotation.

The big one is rewiring your trunk stability. As I opened the brace more and more, it was so difficult to roll properly with my left hand holding the kettlebell. It was even difficult without any weight! I could bore you with more details, but I think as the reader you can see where this is going. At my last appointment with my surgeon the first week of February, I was able to do a full Simple & Sinister routine using a 12 or 16kg kettlebell with my left hand for the get-up depending on how I felt.

Rehabilitation Is About Remembering the Basics of Movement

The get-ups were extremely valuable in my recovery, but I did not forget about the swings. As I could straighten my arm to an acceptable degree, I began doing two-hand swings. While we all know the swing is an elegant hip hinge exercise, we forget how important it is for practicing packing the shoulder in a dynamic environment and relearning to transition between stiffness and relaxation.

The swing is also crucial for patterning your breathing and creating a stiff torso; both of those things are extremely important in developing a strong platform for your shoulder to work correctly. These also added time under tension for my grip, and I also began adding in some jump rope work and several different carries (waiter’s walks, bottoms up, front rack, etc.).

Creating a stable spine and shoulder and moving was another skill I found helpful in recovery. There were several soft tissue and joint mobilization techniques I used, as well as the Marc Pro device, which are beyond the scope of this article. You are more than welcome to research Kelly’s work or attend one of our courses for more information.

Successful Rehabilitation Requires the Right Approach

The surgeon could not believe where I was from a recovery perspective at my last appointment. I was by no means totally healed, but I was cleared to start doing other things.

Anyone who has experienced a complete tendon rupture knows the recovery process is really twelve to eighteen months. Although I have introduced other activities to my routine, get-ups and swings remain a staple. I did not mention this earlier, but this was my fourth surgery (both shoulders, both elbows).

Revisiting the basics of human movement is exceedingly important to me for long-term health. I am at thirteen months post-surgery and constantly return to the get-up when I feel something is not right with one arm or the other. I can usually trace it back to not bracing properly before the initial roll. There is a pearl of wisdom there and many of you may have missed it. If your spine is not stable and your trunk is not stiff and engaged, your shoulder will not work properly. There may be some joint restriction, but if you do not work on spine stability first, you will not get to the bottom of it.

I will finish with a caveat. I am a healthcare professional with many good friends in the fields of strength and conditioning and rehabilitation. I also have many years of experience in weight training and injury care and prevention. If you have torn your distal biceps tendon, seek advice from physicians and physical therapists who understand basic weight training. If your doctor does not deadlift or gives you a funny look when you say “Turkish get-up,” find a new doctor. Had I not myself understood how to use the principles of tension, grease-the-groove, and motor patterns and movements, I would not have been as far along at discharge.

If you are at a loss for a good doctor, contact organizations like StrongFirst or Functional Movement Screen or one of the staff members at MobilityWOD. We may be able to put you in touch with providers in your area who understand the lifter. There is a gap between healthcare providers and the strength and conditioning communities that needs to be narrowed.

Travis JewettDr. Travis Jewett is a Chiropractor, MobilityWOD Team Member and CrossFit Level 1 Trainer. He travels and teaches the CrossFit Mobility Certification as part of the seminar staff. He has been involved in weight training, powerlifting, teaching and coaching for 22 years. He works with a wide range of people at his clinic in Northwest Iowa. Currently on hiatus from competing, he always goes back to picking up his kettlebells. He can be reached at travis@mobilitywod.com.

The StrongFirst Courses and Certifications, as well as the book Simple and Sinister are great ways to learn the methods described in this article.

The post Simple and Sinister in a Rehabilitation Setting appeared first on StrongFirst.


What is “Work Capacity”? [Part I]

$
0
0

By Pavel Tsatsouline, Chairman

The words “work capacity” have joined the fashionable jargon of the industry. What exactly do they mean?

Some folks envision a sweaty multi-minute effort that makes the muscles burn and the heart pump, like a wrestling match or an 800m sprint.  This is glycolysis.

Others lean towards manual labor, brief exertions interspersed with low-intensity activity going on for hours. In science talk this is “high power/low tempo” work. Alactic bursts with aerobic recovery. “A+A”, as Al Ciampa, SFG has snappily abbreviated it.

For some reason, predominantly aerobic exercise is rarely thought of when “work capacity” is mentioned.

A Real-World Explanation of Work Capacity

The tag “work capacity” goes back to post-war Sweden. In 1947, Swedish clinical physiologist T. Sjöstrand evaluated the “physical work capacity” (PWC) of ore smelting workers. He measured the amount of physical work they could do on a bicycle ergometer at a heart rate of 170 in a period of several minutes.

As all tests, this one is biased. A bicycle racer would leave a blue-collar worker in the dust. Then the latter would invite the former to hang with him for a shift at the steel mill. We have our own test, the SFG five-minute snatch test, that can be praised and criticized in the same manner.

The problem is, PWC is not only skill dependent — racing a bicycle or snatching a kettlebell — it is also energy system specific. When we talk about energy systems, “capacity” has a very straightforward meaning — the size of one’s fuel tank. And alactic, glycolytic, and aerobic “tanks” are all filled and emptied differently. You cannot test all three with one test. To complicate the matters further, all three systems work at the same time, albeit changing the ratios of their contribution to the total energy needs. So the “capacity” tested by the five-minute snatch test is not the same as the one tested by the ten-minute test.

The bicycle racer in our above example — a real racer, not a “mamil ”— has a huge aerobic tank that enables him to sustain a moderate effort for a long time. The steel mill worker, on the other hand, has high alactic capacity — plus efficient aerobic recovery. In other words, he manhandles heavy objects without going into glycolytic burn, then quickly recovers. It is the only way. If the worker stayed totally aerobic, he would not have had the strength to pick up the heavy metal. If he went “WOD” glycolytic, he would have collapsed into a worthless pile of sweat just minutes into the hours-long shift.

So when you utter the words “work capacity,” be ready to qualify the dominant energy system: alactic, glycolytic, or aerobic. Or, alternatively, specify the physical load parameters: power, tempo, and duration. If you do not, you are just spewing meaningless jargon.

How to Properly Train Your Energy Systems

There are proven training protocols for training all three energy systems. For the aerobic one refer to the book Peter Park recommends, The Big Book of Endurance Training and Racing by Dr. Phil Maffetone.

Maffetone's version of work capacityFor glycolytic training stick to the guidelines outlined in the Long Rests blog: 20-50sec all-outbursts with super long rest periods and 1-5min 50% efforts. More about this in a near future.

An example of alactic training plus aerobic recovery is a Russian weightlifter’s or powerlifter’s training. He will do many sets of low reps far from failure, with adequate recovery and no pump or burn. “Work capacity” is not his goal, but a nice side effect of his system of strength training. Did you know that Olympic weightlifting champions Plyukfelder and Rigert would put in a full shift of work down in a mine before heading to the gym?

Legendary Rudolph Plyukfelder

Legendary Rudolph Plyukfelder

Maximov, Selouyanov & Tabakov (2011) explained:

“One can perform strength exercises not to failure. E.g., the athlete lifts a 16RM weight 4-8 times. In this case, local fatigue does not develop, there is no high acidification of muscles…  A situation arises that stimulates the development of the mitochondrial network in glycolytic and intermediate muscle fibers. Therefore, a nearmaximal [70-90% intensity—P.T.] exercise with rest pauses develops the muscles aerobically.”

Gray Cook has pointed out that my ETK Rite of Passage military press plan is a work capacity protocol. Inspired by the Soviet weightlifting methodology, it has to be. Even though strength remains its number-one goal and alactic plus aerobic endurance is just a “WTHE.”

Kettlebell Simple & Sinister book

Kettlebell Simple & Sinister is another cutting edge A+A protocol.

You Don’t Want Work Capacity — You Want General Endurance

You might ask, is there such a thing as “general work capacity” that covers all of the above? Yes, but it has a different name.  The term accepted by Soviet sports scientists decades ago is “general endurance.”

In Russian sports science and coaching practice, every quality is subdivided into general and special. “General” refers to “…the ability… to perform any physical work more or less successfully.” (Ozolin, 2006) “Special” is the same thing as “sport-specific.”

“General endurance is the ability to perform for an extended period of time any work involving many muscle groups and placing high demands on the cardiovascular, respiratory, and central nervous systems.” (Ozolin, 2006)

The Takeaways on “Work Capacity”

  • When you have the urge to say “work capacity,” wait till it passes — or be ready to specify the dominant energy system or the power, tempo, and duration of the exercise.
  • If you are unwilling or unable to specify or have something broader in mind, say “general endurance.”

Next article, you will learn that the Russian meaning of the words “work capacity” is altogether different.

Visit the StrongFirst Research page to sign up for an upcoming protocol on these methods.

The post What is “Work Capacity”? [Part I] appeared first on StrongFirst.

The Top Five Ab Training Mistakes

$
0
0

By Pavel Tsatsouline, Chairman

By now, proper abdominal training should not be a mystery. The body of experience and scientific knowledge serve up powerful methods on a platter — yet they get lost in the Internet noise.

Perhaps a fashionable “list article” will catch your attention? With apologies to Rob Lawrence, who rightfully despises list articles as “snack food for the mind,” here is my list of ab dont’s:

1: Chasing the “Burn”

The “burn” is just a manifestation of mounting acidity produced when one is in the glycolytic energy pathway, the choice pathway for amateur coaches more interested in “smoking” their victims than in making them strong. Dr. Fred Hatfield famously quipped, “You like burn? — Light a match.”

High levels of tension are prerequisite for making a muscle stronger and the highest levels of it are available for less than thirty seconds —b efore the burn kicks in.

2: Not Focusing on the Contraction

Your muscle can contract in response to the load (feed-back) or to a command from your brain even in the absence of resistance (feed-forward). Examples of the former are the farmer’s carry and the double kettlebell front squat. Examples of the latter are, the double kettlebell clean, the hard-style sit-up, and power breathing. For maximal strength development both types of training are a must.

Bodybuilders got the feed-forward ab work figured out. They focus on the contraction rather than the reps — and have the abs to show for it. First Mr. Olympia Larry Scott, a master of “mind-muscle connection,” showed me some of his ab contraction techniques. His attention to detail and understanding of anatomy were impressive and his focus was extraordinary. Mr. Scott was the exact opposite of the clowns glued to their phones while doing crunches.

AbPavelizer Ab Training

Pavel’s patented abdominal training device has clocked over 175% of maximal voluntary isometric contraction at Prof. McGill’s lab. In other words, if you purposefully tense your abs as hard as possible, the Ab Pavelizer™ will make them tense almost twice as hard!
Photo courtesy Prof. Stuart McGill’s Spine Biomechanics Lab at the University of Waterloo, Canada.

3: Not Using Enough Resistance

Feed-back training demands high external resistance. It can be a heavy weight or poor leverage.

Examples of the former include the full contact twist and the one-arm farmer carry. I am not including a weighted sit-up because it is a pain logistically. Getting a stack of 45-pound plates in place and then holding onto them is not something you want to do more than once. Examples of the latter are the dragon flag and the hanging leg raise.

4: Exclusively Isometric Training

Isometrics are very valuable and the role of planks, L-seats, and heavy lifts demanding a strong brace cannot be underestimated. However, experience has taught me that people who have not trained their abs dynamically, a stretch followed by a peak contraction, are not fully aware how to engage them 100% statically. (Of course, such training is not for the flexion intolerant.)

5: Not Making Every Exercise an Abdominal Exercise

An expertly performed heavy deadlift is an exercise in both feed-forward and feed-back tension. Engaging a solid brace before the pull is the former. Staying tight under a moving load is the latter.

Former Mr. Olympia Dr. Franco Columbu told me that because he hated direct abdominal work all he did for his abs was keeping them tight in all lifts. He ended up winning the “Best Abs” award and, more importantly, deadlifting over 700 pounds at a bodyweight of around 180.

No More Ab Training Mistakes

The full contact twist.
Photo courtesy Prof. Stuart McGill’s Spine Biomechanics Lab at the University of Waterloo, Canada

The Ab Training Call to Action

There are many exercises to choose from for effective ab training. The key is to practice both feed-forward and feed-back tension and to say farewell to the “burn.” All of the StrongFirst curricula — kettlebell, bodyweight, and barbell — are obsessive about building strong abs. Consider the Total Tension Kettlebell Complex as an example.

You can always keep it Kettlebell Simple & Sinister. On the given plan the efforts are brief and intense — 10 reps per set in the swing and 1 in the get-up. The get-up has a dynamic spine flexion component that cramps your abbies the way the sit-up never could. Feed-forward tension is addressed through bracing and power breathing. Feed-back tension is taken care of once you persevere to reach at least the “simple” goal. When you wrestle a heavy kettlebell in a single-arm exercise, everything in your midsection cannot help lighting up like a Christmas tree.

Power to your abs!

The StrongFirst Courses and Certifications are great ways to learn the feed-forward and feed-back methods in this article.


The post The Top Five Ab Training Mistakes appeared first on StrongFirst.

S&C Training for MMA With Simple & Sinister

$
0
0

By Pavel Macek, SFG Team Leader

On January 24, 2015, Viktor Pešta won a unanimous decision over Konstantin Erokhin. Below are the secrets to his strength training.

Viktor’s MMA coach, Dan Barták, and his gym, Penta Gym Prague, were voted as best MMA gym and best MMA coach of 2014. Moreover, Viktor left for Sweden to Allstars Training Center and later to Alliance MMA in the U.S. to train with elite MMA coaches and athletes like Alexander Gustafsson and Phil Davis. As far as MMA preparation was concerned, he had great coaching. Strength and conditioning, on the other hand, was a different story. Viktor says:

“As for strength and conditioning prep, I didn’t have any systematic approach before. Sometimes I did a CrossFit WOD or some circuit training, or visited a regular gym.“

It was time to change that. Our KB5 Gym Prague took over his movement, strength and conditioning prep.

Viktor Pesta's coaching team for UFC

Dan Barták (MMA coach), Viktor Pešta, and Pavel Macek (S&C Coach)

Below is a short summary of our basic MMA prep for Viktor and his brothers-in-arms. As you read through, take careful note that everything we did was made to enhance his skill in his sport; anything that could have gotten in the way was mercilessly avoided or removed. A solid lesson in training any of your clients – be they athletes or average Joes and Janes.

Begin by Assessing Movement Quality

First and foremost, we ran Viktor (as well as other fighters) through the FMS screen and assigned him a few corrective exercises to take the brakes off of his body and unlock his power (hamstring stretch, hip flexor stretch, and T-spine mobility drill).

We also taught Viktor a short Original Strength resets sequence, as well as Simple & Sinister (S&S) kettlebell warmup. Ten minutes each training session and he was done, ready to move on to the meat of the program.

S&C Training for MMA Means GPP

Our StrongFirst-based strength and conditioning program included kettlebell, bodyweight, and barbell work. As the entry tool, I chose the kettlebell and put Viktor on an S&S program (i.e., kettlebell swings and get-ups). S&S in the mornings, MMA training later in the day, and both almost daily. Viktor commented:

“When I started to train according the StrongFirst methodology in the KB5 Gym, I didn’t like it in the beginning that much because Pavel was very strict about working on proper technique first. But when we started to lift heavier weights, everything changed and I started to enjoy the practice a lot.”

S&C Training for MMA

Viktor quickly got to 40-44kg kettlebells in his swings and get-ups.

Once Viktor got to heavier get-ups (36 kg+), we started to alternate get-ups with push presses (Pavel Tsatsouline’s recommendation). One day we did swings and get-ups, the other day swings and push presses. Push presses were also done in an S&S way – 10×10 with a focus on  maximum power output, with Fast & Loose shadow boxing between the rounds.

I was very careful about the maximum explosiveness in Viktor’s swings and push presses, and the breathing and recovery between the rounds, as well as control and proper movement in his get-ups.

Viktor quickly got to 40-44kg kettlebells in his swings and get-ups, and a 28kg kettlebell in push presses. On couple of occasions, I had him deload the weight to make sure every single rep stayed crisp and strict. We didn’t worry about breaking lifting records or learning more complex exercises – he is an MMA fighter, not powerlifter or girevik.

S&C Training for MMA

We didn’t worry about breaking lifting records or learning more complex exercises.

Tempting as it may be to allow your ego to get the better of you, whenever you are training a professional athlete anything that does not directly improve the qualities required by their sport must not creep into their programming, no matter how sexy or popular they may be. Just enough is plenty.

With this mindset, I left all of his other conditioning work for his already intense sport-specific MMA practice – i.e. shadow boxing, heavy bag work, pads, sparring drills, and sparring. I also recommended that he focus on easy and medium MMA training sessions in the off-season and build up a solid strength, conditioning, and MMA skill foundation for future pre-fight tapering.

Specific Sport Preparation for MMA

Once or twice a week, I prescribed wrestler bridges – front, back, and the so-called rolling bridge. I also remind all the fighters that clinch work equals neck strengthening. As we saw in the fight with Erokhin, Viktor’s strong neck (and strong will!) helped him survive the grenades his opponent threw at him. Neck strengthening drills are a must for all combat athletes.

Wrestling Neck Bridge George Hackenschmidt

Neck Bridges: Russian Lion George Hackenschmidt

S&C Training for MMA: The Lifestyle Component

Some fighters are willing to train hard, but to have results like a pro, they also have to eat and rest like pros. I recommended that Viktor eat grass-fed meat, fish, eggs, vegetables, healthy fats (butter, ghee, coconut oil, good quality olive oil, avocados), rice, and potatoes. Also, plenty of water. We have cut grains, legumes (including soy and soy products), sweets, sweet soda drinks, artificial fats like margarine, vegetable oils, diary, and fast food. We added omega 3, probiotics, good quality protein drinks, and BCAAs as supplements.

As for regeneration, the order was to go sleep early (10:30pm at the latest), to have at least eight hours of good quality sleep (preferably more), and if possible get a short nap after the morning practice session. I have also prescribed simple cold showers protocol for better recovery.

Tapering for the Fight

In the end of 2014, Viktor left for Sweden to a training camp at Alexander Gustaffson‘s Allstar Team. The closer he came to his fight, the more sport specific Viktor’s strength and conditioning preparation was. As the fight approached, we reduced his kettlebell practice to two times a week, as his MMA prep was getting more and more intensive and would not tolerate anything more than the bare minimum of practice if both his preparation were to remain solid and his victory to be assured. Viktor recalls:

“When I arrived in Sweden for my MMA camp, many of my fellow fighters told me that I am stronger than the last time they saw me. I was happy to see  the objectively measurable results. The StrongFirst-based strength and conditioning prep advantage is that it is not time consuming. Same goes for the equipment. I was traveling a lot, but I could find kettlebells in every gym, so I could continue with my training program.”

Viktor Pesta S&C Training for MMAViktor’s Sample Program – A/B Training Sessions

“A”

Morning Practice:

  • Foam Rolling, Original Strength Resets – 10 minutes
  • S&S Movement Prep – 3 circuits of (10x Halo, 5x StrongFirst Hip Bridge, 5x Prying Goblet Squat)
  • S&S Swings – 10×10, active rest – MMA shadowboxing, done in the Fast & Loose way
  • S&S Get-ups – 5+5
  • Stretching

Afternoon Practice

  • MMA

“B”

Morning Practice:

  • Foam Rolling, Original Strength Resets – 10 minutes
  • S&S Movement Prep – 3 circuits of (10x Halo, 5x StrongFirst Hip Bridge, 5x Prying Goblet Squat)
  • S&S Swings – 10×10, active rest – MMA shadowboxing, done in the Fast & Loose way
  • Push Presses – 10×10, active rest – MMA shadowboxing, done in the Fast & Loose way
  • Stretching

Afternoon Practice

  • MMA – pads, heavy bag, technique, sparring drills, sparring

Homework: Correctives, neck strengthening exercises, proper diet, enough rest.

Take careful note that his program encompasses more than simply lifting kettlebells. In true StrongFirst style, the quality of his movement as well as the quality of his recovery are elements that receive ample attention in his training, while making the right amount of room for the training needed to help him excel at his sport. As you’ll notice, what is the “right amount” changes as the demands of his sport practice change. The same holds true for any student. The ebb and flow of life demands an ebb and flow in training.

Keys to the Fight

The development of sustaining power (like the power wrought from StrongFirst’s Hardstyle kettlebell training) is one of the keys to success in MMA – you can’t count on a first round KO. Joe Rogan commented:

“This is a real lesson for fighters who are watching this as well – don’t always unload that gas tank – be prepared for a guy like Viktor Pešta.”

The Results

The judges scored the fight 3:0 for Viktor – unanimous decision victory (29-28, 30-27, 30-27). When asked about his strength and conditioning prep, Viktor said: “My strength and conditioning definitely helped me in the fight. Unlike my opponent I didn’t gas out in the first round and kept the pressure for all three rounds.”

Viktor, congratulations!

Viktor Pesta Wins UFC Fight

The judges scored the fight for Viktor with a unanimous decision.

About Viktor Pešta: Viktor is currently the only Czech fighter in UFC. He trains MMA at Penta Gym Prague under Dan Barták and in Swedish Allstars Team with Alexander Gustafsson. His strength and conditioning preparation is taken care of by KB5 Gym Prague under the guidance of Pavel Macek, SFG Team Leader. Please visit Viktor‘s official Facebook page. Any type of PR or sponsorship is greatly appreciated!

Pavel Macek StrongFirstPavel Macek, SFG Team Leader, SFB, SFL, teaches strength and conditioning at KB5 Gym, Chinese combatives (Practical Hung Kyun) and MMA.

(This article was humbly and gratefully edited and proofread by Aleks Salkin, SFG II, SFB – a friend of Pavel Macek and a fan of Viktor Pešta)


The post S&C Training for MMA With Simple & Sinister appeared first on StrongFirst.

Long Rests: Russian Science to the Rescue

$
0
0

By Pavel Tsatsouline, Chairman

In the beginning he was Christopher Bellew. By the time he was at college he had become Chris Bellew. Later, in the Bohemian crowd of San Francisco, he was called Kit Bellew. And in the end he was known by no other name than Smoke Bellew. And this history of the evolution of his name is the history of his evolution…

Not long ago, my father and I were having a typical father and son conversation, about rest periods between sets. He reminded me of Smoke Bellew, a classic story by one of our favorite writers, Jack London. The protagonist, a city slicker, tries “high intensity interval training” in the wild:

He fastened the straps to a ninety-five-pound sack of beans and started. At the end of a hundred yards he felt that he must collapse. He sat down and mopped his face. “Short hauls and short rests,” he muttered. “That’s the trick.”

Sometimes he did not make a hundred yards, and each time he struggled to his feet for another short haul the pack became undeniably heavier. He panted for breath, and the sweat streamed from him. Before he had covered a quarter of a mile he stripped off his woolen shirt and hung it on a tree. A little later he discarded his hat. At the end of half a mile he decided he was finished. He had never exerted himself so in his life, and he knew that he was finished. As he sat and panted, his gaze fell upon the big revolver and the heavy cartridge-belt.

Jack London Fitness TrainingEventually, as Chris evolves to Kit and Kit starts evolving into Smoke, he learns:

Kit plodded along the trail with his Indian packers. In recognition of the fact that it was to be a long pack, straight to the top of Chilcoot, his own load was only eighty pounds. The Indians plodded under their loads, but it was a quicker gait than he had practiced. Yet he felt no apprehension, and by now had come to deem himself almost the equal of an Indian.

At the end of a quarter of a mile he desired to rest. But the Indians kept on. He stayed with them, and kept his place in the line. At the half mile he was convinced that he was incapable of another step, yet he gritted his teeth, kept his place, and at the end of the mile was amazed that he was still alive. Then, in some strange way, came the thing called second wind, and the next mile was almost easier than the first. The third mile nearly killed him, and, though half delirious with pain and fatigue, he never whimpered. And then, when he felt he must surely faint, came the rest. Instead of sitting in the straps, as was the custom of the white packers, the Indians slipped out of the shoulder – and head-straps and lay at ease, talking and smoking. A full half hour passed before they made another start. To Kit’s surprise he found himself a fresh man, and ‘long hauls and long rests’ became his newest motto.

Modern Russian sports science supports “long rests” for your conditioning.

Most coaches still base their endurance training on the XX century model of muscle cell energy supply. They train the power and the capacity of each of the three energy systems, alactic, glycolytic, and aerobic. Glycolytic capacity training or “HIIT”— the antithesis of “long rests” — is especially popular.

Smoke Bellew Takes Long RestsRevolutionary research by Prof. Victor Selouyanov teaches us that instead we should be focusing on building aerobic power plants — mitochondria — in our muscles. In slow twitch fibers, it can be done by building the fibers themselves. They grow with new mitochondria pre-installed at no extra charge. (I explained how in the Should You Train Your Slow Fibers? series of blogs.)

In intermediate and fast fibers, mitochondria are developed by pushing the fibers into light acidity (slight local fatigue), then backing off and recovering aerobically over and over. (Kettlebell Simple & Sinister does just that.)

If you let the “burn” in the muscle rise too high, you literally destroy the mitochondria, the very thing you tried to build. And, as new research suggests, being “acid” could lead to worse problems than that, in addition. Al Ciampa, SFG warns:

Deep and frequent glycolytic training, the brand so common in fitness training today, that leaves you lying on your back sucking wind in its wake, causes an accumulation of cellular damage that will express itself on a systemic level as daily lethargy, a lack of energy, and eventually, adrenal exhaustion/shutdown which begins a cascade of endocrine problems that your doctor will not likely figure out. Research suggests that frequent exposure to the free radicals and lactate produced by continued exercising above the cell’s ability to use oxygen (high-intensity anaerobic work) causes cellular organelle damage that accelerates aging and cause ill health. You can see this cluster of symptoms manifest in a typical high-intensity junkie who walks around like a zombie, is only “awake” when it is time to train, and is in and out of the doc’s office for unexplained health issues. Deep glycolytic training is a highly volatile form of rocket fuel that should only be minimally dosed by elite athletes preparing for an event that either grants them a million dollar paycheck, or an Olympic gold medal.

Russian science to the rescue.

Maximov, Selouyanov & Tabakov (2011) classify predominantly anaerobic work of different intensity as:

  1. Maximal power exercises (90-100% intensity contraction, <20sec duration)
  2. Nearmaximal power exercises (70-90% intensity contraction, 20-50sec duration)
  3. Submaximal power exercises (50-70% intensity contraction, 1-5min duration)

To counter the side effects of acidosis Prof. Selouyanov insists on plenty of rest between sets. A 1:2-6 work to rest ratio is recommended, but, unless you are very well conditioned aerobically, play it safe with 1:4-6.

And when it comes to the submaximal power zone notorious for its crazy acidity, the scientist demands unimaginable to many 10-30 minutes of rest! In addition, he warns against any all-out efforts 1-5 minutes in duration — except in competition. Not only do you burn up your mitochondria, but great psychological and endocrine stress in this zone quickly leads to overtraining.

In all zones the rest must be active — walk around and do “fast and loose” drills rather than plop on the deck and suck wind.

Applying Long Rests to TSC Training

Here is how the above “long rests” recommendations can be applied to the TSC five-minute snatch event with a 24kg kettlebell:

  • On Monday, deadlift and then do 10-20 sets (sum of both arms) of 7-10 one-arm kettlebell swings with 40kg on the minute every minute.
  • On Wednesday, snatch 32kg hard with your left arm for as many perfect reps as you can.  Stop before your grip gives out or you compromise your explosiveness.  Park the bell and rest for 4-6 times the duration of your set before matching the reps with your right. (E.g., you got 10 reps in 30 seconds with your left, so you rested for 2-3 minutes before hitting your right.)  Repeat for 4-6 sets (sum of both arms).
  • On Friday, go for full 5 minutes — with a 16kg. While maintaining our trademark explosiveness dial the effort of each rep down to 50%. And carefully maintain the pace you intend on using in competition. Do 2-3 sets in this manner with 10-30 minutes between them. As an option, do a time ladder of 4, 5, and 6 minutes.

Let “long rests” become your new motto.

Long rests work for TSC training

Hector Gutierrez at Hardstyle KBJJ, competing in the elite division of the TSC.

The Fall Tactical Strength Challange is coming in October

Ready to host a TSC event? Contact us here to learn more: TSC@strongfirst.com


The post Long Rests: Russian Science to the Rescue appeared first on StrongFirst.

A Comprehensive 3-Month Plan for Beginner Group Lessons

$
0
0

By Pavel Macek, Senior SFG

“Begin at the beginning,” the King said. I would like to add, “And then don’t stop.” The following article gives a blueprint of how we do exactly that for our beginners’ group lessons in our StrongFirst-powered chain of seven gyms in Czechia, Europe.

Mission Objectives

  • Move well, move often, move strong—build the foundation for subsequent successful strength training
  • Untie the chair—restore necessary mobility, deal with asymmetries/imbalances, and restore movement
  • Restore diaphragmatic breathing and learn power breathing
  • Strengthen the grip
  • Strengthen the midsection

Lesson Flow

In exactly the same way the program at large requires progression from one element/exercise/weight to another in a logical order, so does each individual lesson. Each sixty-minute lesson is a reflection of the structure of the program as a whole, only in miniature.

A session consists of:

  1. Group greeting
  2. Warm-up, correctives, and movement prep
  3. Strength program
  4. Conditioning program
  5. End of the lessons, evaluation, homework assignment

StrongFirst Beginner Group Lessons

1. Group Greeting

The instructor begins by shouting, “zdar a sílu!” This is an old Czech sport greeting, meaning something like “success and strength” or “health and strength.” The group replies “KB5!” This is the name of our gym. The instructor then says, “Powered by…” and the group answers “StrongFirst!”

Through this greeting, everybody is awakened and energized for the practice to come. The students love it, and it helps build a sense of purpose and community while setting the tone. Last but not least, it pays respect to our Alma Mater, StrongFirst.

If a student comes late, he or she will get a special motivational work-in—if the student doesn‘t swing yet, they are assigned ten minutes of crawling. If he or she can swing, then the work-in is 10×10 two-handed swings with 16+kg (or 12+kg for women). If the student can swing and do the goblet squat then the assignment is: 10 swings and 10 goblet squats, 10 swings and 9 goblet squats, 10 swings and 8 goblet squats…up to 10 swings, 1 goblet squat.

If students don‘t like this, then we gently suggest they join a mirror-and-fern-laden health spa where the instructor apologizes to them if they come late.

And what if the instructor comes late? Same thing—swings, only with a heavier bell. We are egalitarian that way.

StrongFirst Beginner Group Lessons

2. Warm-up, Correctives, and Movement Prep

The warm-up serves not really as a “warm-up” per se, but rather as an undoing of the chair-like posture so many of us are heir to from sitting at our computers all day. This is done through some intelligent and focused movement-prep consisting of foam rolling, corrective stretching, Original Strength resets, and kettlebell movement prep.

After around one month of training with us, once the students have learned all the drills above correctly and remember them, their warm-up consists only of Original Strength resets and/or kettlebell movement prep. Foam rolling, stretching, and mobility work becomes their homework.

If needed, students can foam roll a problematic part or do corrective stretches during the rest time on the training lesson. As the old saying goes, “If it ain’t broke, don’t fix it.” Most students just do Original Strength resets or Fast & Loose drills during the rest periods to keep fresh, moving well, and ready to attack the next set.

Here is our exact sequence and the respective drills:

a) Foam Rolling: 5 minutes at the lesson, or done as homework

  • Posterior sequence: calves, hamstrings, glutes, T-spine, lats
  • Anterior sequence: thighs, hip flexors, inner thighs, pecs

b) Corrective Stretching: Taught, then practiced as homework

  • Towel hamstring stretch—for better hinge
  • Kneeling hip flexor stretch—for better lockout
  • Rib pull or Brettzel 1.0—for better T-spine mobility and overhead lockout
  • Brettzel 2.0 and 90:90 stretch—compensation of heavy unilateral work
  • Gymnastic bridge and progressions leading to it—all-in-one drill, strengthening the posterior chain, stretching the anterior chain

Note: After the students learn this sequence, this too becomes their homework. They don’t stretch at the beginning of a class—they stretch after the lesson or at home.

c) Original Strength Resets: 5-10 minutes

  • Breathing, head nods, rolling, rocking, crawling, marching. Move!

d) Kettlebell Movement-Prep: 5 minutes

  • Halo
  • Prying goblet squat and later kettlebell Cossack
  • SFG armbar, bent armbar

StrongFirst Beginner Group Lessons

3. Strength Training

Finally we reach the core of the rendezvous with the iron. After all, this is why the students attend. Chosen drills for the students include:

  • Deadlift, suitcase deadlift, single-leg deadlift: Mainly as progressions leading to swing, two-hand swing, and one-hand swing, which are the main hinge/lower pull goal. Foundation for cleans, snatches, barbell deadlifts, etc. Sets of 5-10.
  • Naked get-up, half get-up and finally the full get-up and its variations: A loaded reset that deals with asymmetries and serves as the foundation for all overhead lifts. 5 singles each side.
  • Hollow position progressions to hollow hang: As taught at the SFB Course and Cert.
  • Goblet squat: We teach prying goblet squat right in the beginning, but save the actual squatting for later weeks so the students don’t confuse hinge and squat. We are not concerned that much with the weight in the early stages, but on emphasizing the correct movement pattern. As Pavel said at our SFB Cert, “Not everybody needs to squat heavy, but everybody needs to squat. Goblet squat is the squat for everybody.” After demonstrating competence in the two-hand swing, the students start to squat as well, ordinarily for sets of 5.
  • Push-ups: SFB plank to push-up progressions. We don’t go over 15 push-ups. When the student can perform 15 push-ups, we put him on heavy floor presses instead. In floor presses, students work on 3-5 sets of 3-5 reps short of their max.

An Eagle’s Eye View of the Strength Lesson

Now that we’ve detailed each individual part of the lesson, it’s time to take an eagle’s eye view of the layout of the skills and how they are paired together.

  1. 5th Element: Get-up, 5 each side. The students add the weight following the Simple & Sinister sandwich method.
  2. Squat + upper body pull: Alternate goblet squat (5 reps) and hollow position drills/hang (max rep minus 2-3, but not more than 15 reps), plus some hip flexor or cobra stretches
  3. Hinge + upper body push: Alternate deadlift and its variations (5-10 reps) and push-ups (max rep minus 2-3, i.e. not to failure, but not more than 15 reps) or floor presses (sets of 3-5).

Note: Don’t be obsessed with doing everything. The most important part are the get-ups. If the student doesn’t know some of the drills, it‘s not a problem. Have them do what they know. If you don’t go through all the movement patterns, this is similarly no problem at all. Like a Chinese herbal recipe—you need just the main ingredients—if a few of the minor ones are missing, it still works.

Beginning students don‘t need to go heavy early on. Let them concentrate on proper movement, good technique, and active rest (Fast & Loose, Original Strength resets). Heavy will come with time. Whatever you do, don’t allow the class to degenerate into circuit training.

StrongFirst Beginner Group Lessons

4. Conditioning

We have finally arrived at the last ten minutes of class. As you can imagine, this is where the students “go ballistic,” particularly with the help of the swing.

What do we do if the student can’t yet swing? We used to do burpees and similar things, but not anymore (at the early stages the student probably can’t squat and do a push-up well anyway). Instead, we employ:

  • Crawling regressions and progressions, like baby crawl and leopard crawl.
  • When the students already know suitcase deadlift, they practice suitcase carry or farmer’s carry, or alternate crawling and carries.
  • When they can finally swing—they swing! First they focus on two-hand swings, and later, when their two-hand swings are perfect, they do the one-hand swing and occasionally other variations (power swing, hand-to-hand swing). Do 10 swings every minute for 10 minutes. The aim of the beginner’s swing protocol is excellent technical precision and maximum explosiveness, not blood-and-guts high-rep sets.

Standards for Beginner Group Lessons

Everyone needs a goal to shoot for. While individual strength and athletic goals may vary, these are the benchmarks we set for our students to help support any other long-term goals they may have. All are achievable with time, patience, and perseverance.

  • 5 get-ups each side—ladies with 16 kg, gentlemen with 32 kg – in 10 minutes.
  • One-hand swings 10×10, in 10 minutes—ladies with 16 kg, gentlemen with 24.
  • Push-ups—ladies 10+, gentlemen 15+.
  • Hollow chin-up/pull-up hang—ladies 30 seconds, gentlemen 45 seconds.
  • Perfect goblet and bodyweight squats—we don‘t care about the reps or weight, just the movement. As Gray Cook says, “Maintain the squat, train the deadlift.”

We are a school of strength and conditioning, not an amusement park. If the students are strong and in shape, we all do our job well—hence the standards.

Note: There is no need to wait until the student fulfills all the requirements before teaching new drills, e.g. when they can do a good hollow hang, they start to work on their chin-ups/pull-ups. If the student can perform one-hand swings well, he or she can start to learn the clean and different swing protocols (first building up the reps, and later restarting with lower reps again but heavier weight). If the student‘s goblet squat is good, he or she can start to work on the front squats together with clean practice. If the students can perform 5 get-ups per side with 32kg (or 16kg for ladies) and 15 push-ups (10 for ladies), they can start to work on the military press.

StrongFirst Beginner Group Lessons


The Beginner Group Program for the First Few Months

First Lesson

Encourage the newbie to join in the group, and try to follow what they see during the warm-up. Let them know not to worry, that later you will work with them individually.

After the warm-up, give orders to the group, and take the newbie to the side. Explain what the aims and benefits are in the lesson. Show them the first stretch and let them practice it. Later, show them the second stretch and have them practice both stretches one and two. Later, show them the third stretch and let them practice all three together. You can leave stretches four and five for the next lesson. There’s little chance they will remember all five stretches. Moreover, no one is going to get excited about stretching for a whole hour.

Explain the basic resets—especially the diaphragmatic breathing, head nods, and rolling, as well as their importance in building a base for their future success. Teach them Fast & Loose drills. During the last ten minutes of class, have them do the baby crawl and/or leopard crawl.

This is a win-win approach because the students get what they need (correctives and restorative exercises) and what they want (“exercise“ in the form of 10 minutes of crawling, which is humbling for everybody). Most important of all—no harm was done!

There are a few important things to remember when dealing with any newbie:

  • They need to have a clear overview of the game plan for next few lessons, weeks, or months.
  • They need an overview of the game plan for the first lesson. “We will do few correctives because of X, Y, and Z reasons, movement prep, and some crawling in the end.”
  • They need to feel they got in a workout, i.e. the student didn’t just do boring correctives – hence the crawling.
  • They need close attention, but not babysitting.
  • They require clear commands of what to do in an exercise—”Alternate left and right leg until I come back to you in few minutes”—and what to do in the rest periods—Fast & Loose drills.

First Month

  • Foam rolling, corrective stretching, Original Strength resets
  • Halo, prying goblet squat, SFG armbar, bent armbar; deadlift prep (hinge, SFG hip bridge, hard style plank)
  • Deadlift, suitcase deadlift, single-leg deadlift, suitcase and farmer carries, hollow position floor intro progressions, naked half get-up
  • Half get-up with the weight

Second Month

  • Full get-up—with the shoe first, then with weight
  • Hollow hang
  • Two-hand swing
  • Goblet squat, push-ups

Third Month

  • One hand swing, floor press.
  • Progress them forward according to their progress shown in the previous two months

After they fulfill all the requirements listed above, most of our students move on to our SFG Course program (press 1–swing+goblet squat–press 2), Rite of Passage program, or basic kettlebell plus barbell program (Kettlebell + Deadlifts Part I).

Parting Notes

  • Safety first. Have standard operating procedures, i.e. enough space around when doing get-ups, nobody in front when swinging, one man-one bell only (unless the student is doing a double bell program), etc. Ensure each student knows and understands.
  • Do no harm, don’t hurry, and have a progression/regression for everything.
  • Students must have a training log and carry it with them to class—this is non-negotiable.
  • Train to success, not failure.
  • Technique, technique, technique.
  • Change the mindset. You are not a personal trainer with clients—you are StrongFirst instructor with students.
  • Make sure they do their homework! “What if I don’t have any kettlebell or pull-up bar?” they will ask. The answer? “Get them.” Meanwhile, they can still do get-ups with a shoe, mobility squats, hollow position floor progressions, crawling, and stretches.
  • Assign the following homework for overweight student: 3-5 sets of steak and vegetables, daily. Cut wheat products, soft drinks, sweets, and alcohol (for the time being, anyway)
  • Something both you and the students should practice.

Don’t be afraid to be StrongFirst. All the equipment we have is kettlebells, pull-up bars, power racks, and barbells. We completely ignore all fitness trends, and do what we have learned from our StrongFirst teachers—and we are very successful. No trial, no error—just a system, a plan, and results.

Pavel Macek StrongFirstPavel Macek, Senior SFG, SFB, SFL, teaches strength and conditioning at KB5 Gym, Chinese combatives (Practical Hung Kyun) and MMA. Please visit his blog Simplex Strength.

Special thanks to Aleks Salkin, SFG II, SFB for help and proofreading the article.

The post A Comprehensive 3-Month Plan for Beginner Group Lessons appeared first on StrongFirst.

Viewing all 73 articles
Browse latest View live